Table of Contents
You don’t need a full remodel to make your bathroom look sharper and feel bigger. Start by matching simple bathroom updates to your time and budget, then focus on high-visibility swaps: modern hardware, warmer-bright lighting, and a cleaner-lined mirror. Add moisture-safe paint or peel-and-stick tile for instant texture, then finish with coordinated towels and fresh caulk for that just-updated look. The key is knowing what to change first—and what to skip.
Choose Bathroom Upgrades by Budget and Time

Where should you start when your bathroom wishlist is bigger than your budget—or your schedule? Map upgrades on a quick grid: cost, time, and visual payoff. For Budget friendly options, target high-impact surfaces you already see daily: deep-clean and re-grout tile, brighten walls with a moisture-resistant paint in warm white or muted clay, and upgrade lighting temperature with soft, high-CRI bulbs for truer skin tones.
Next, choose Time efficient upgrades that don’t disrupt plumbing: swap a builder-grade mirror for an arched or thin-frame style, add a slim over-toilet cabinet for vertical storage, and hang a fabric-lined shower curtain to soften echoes.
If you can spare a weekend, refresh caulk lines and add peel-and-stick floor tiles for pattern without demolition.
Swap Bathroom Hardware (Faucet, Pulls, Towel Bars)
You’ll get the biggest visual lift by swapping bathroom hardware—faucet, cabinet pulls, and towel bars—in one cohesive finish like brushed nickel, matte black, or warm brass.
Stick to a single metal and sheen so small spaces read calmer and more intentional, not cluttered.
Start with key touchpoints you use daily—the faucet and pulls first, then towel bars—to modernize fast without a full remodel.
Choose A Cohesive Finish
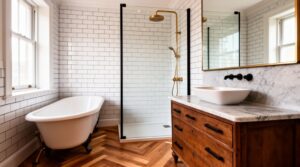
Even if you don’t change a single tile, choosing one cohesive metal finish across your faucet, cabinet pulls, and towel bars instantly makes the bathroom feel more intentional and updated.
Pick a finish that suits your palette: warm brushed brass softens cool whites, matte black sharpens modern neutrals, and polished nickel keeps small spaces bright and reflective.
Commit to Color coordination by matching undertones with your mirror frame and light fixture so nothing looks accidental.
Maintain material consistency too—don’t mix glossy and brushed versions of the same metal unless you’re deliberately creating contrast.
In tight baths, streamlined profiles and thinner bars read less visually busy.
Before buying, check each item’s “family” name, not just the color, to avoid slightly mismatched shades.
Upgrade Key Touchpoints
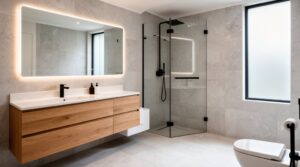
If you want the biggest visual payoff without remodeling, upgrade the touchpoints you use daily—your faucet, cabinet pulls, and towel bars. Swap a dated chrome faucet for matte black, brushed nickel, or warm brass to instantly modernize the vanity.
Match pulls to the faucet finish, then size them up slightly for a more custom, high-end look. Replace thin towel bars with streamlined, wall-hugging rails or a double bar to save inches and add function.
Choose hooks behind the door for tight layouts and create smart storage solutions by adding a coordinating paper holder with a shelf.
While you’re at it, clean grilles and upgrade bathroom ventilation hardware to a quieter, sleeker cover that disappears visually. Keep lines aligned and spacing consistent throughout.
Upgrade Bathroom Lighting and Bulbs for Brightness
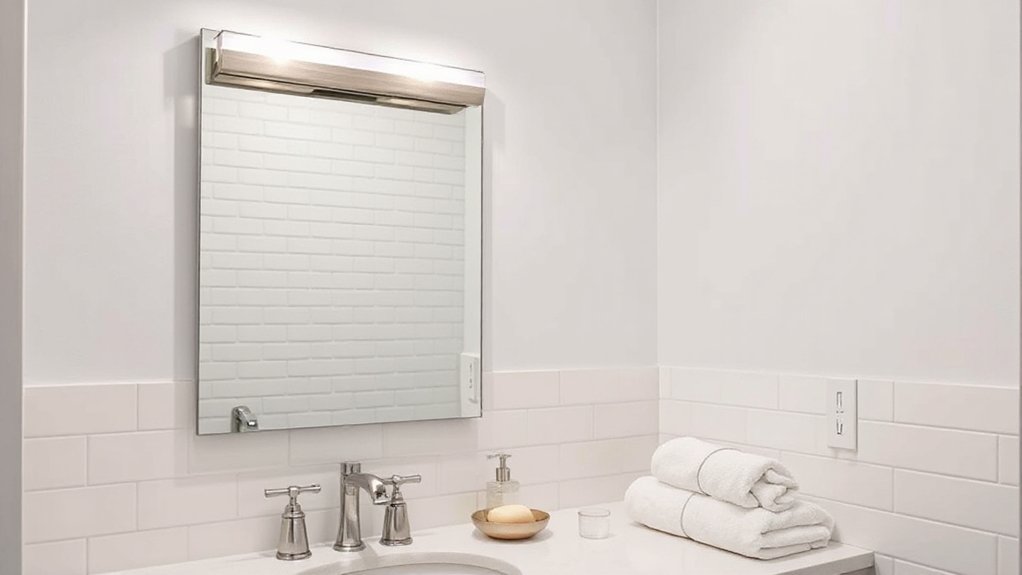
While tile, paint, and fixtures set the vibe, your bathroom’s lighting determines how clean, bright, and spacious it actually feels. Swap dated globes for slim LED flush-mounts or a small semi-flush to boost ambient lighting without crowding the ceiling line.
In tight baths, choose a fixture with a wide diffuser to soften shadows and bounce light off white surfaces. Then upgrade bulbs: aim for higher bulb brightness (around 800–1,100 lumens per bulb) and a flattering 3000–3500K color temperature that reads fresh, not blue.
Put lights on a dimmer so mornings feel crisp and evenings feel calm. If you’ve got only one ceiling light, add a low-profile recessed can to spread illumination evenly.
Replace Your Bathroom Mirror for Instant Style
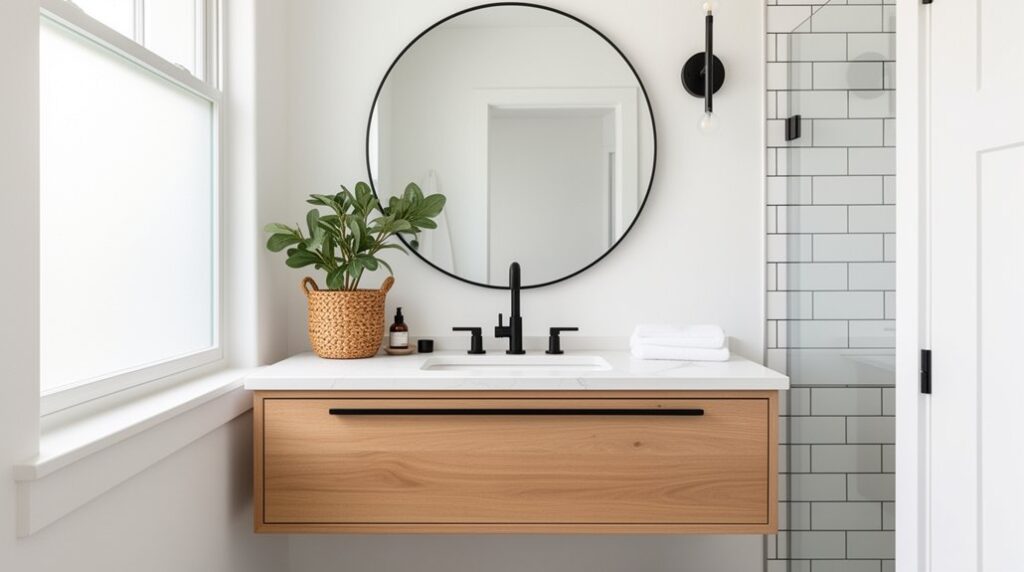
Because your mirror sits at eye level and catches every beam of light, replacing it delivers an instant style upgrade that makes the whole bathroom feel more intentional.
Swap a builder-basic rectangle for an arched top, soft-oval, or thin metal frame to add structure without eating up space.
Prioritize mirror placement: center it over the vanity, keep it a few inches above the faucet, and scale it to the sink width so it looks tailored, not floating.
In tight baths, choose a larger mirror to visually expand the room.
In double-vanity layouts, match two identical mirrors for a boutique look.
Explore frame styles—brushed brass, matte black, light oak, or fluted resin—to echo your hardware and keep finishes cohesive.
Paint Bathroom Walls (or Add Peel-and-Stick)
Freshen up your bathroom fast by repainting with a moisture-resistant, mildew-fighting formula that stands up to steam and splashes. If you want a low-commitment, space-smart upgrade, you can apply peel-and-stick panels to create a crisp accent wall or faux-tile look without adding bulk.
Keep the palette light and the finish durable, and you’ll get a cleaner, more current feel with minimal disruption.
Choose Moisture-Resistant Paint
One smart upgrade can make a small bathroom feel instantly cleaner and more current: moisture-resistant paint. Choose a satin or semi-gloss finish designed for baths; it sheds steam, wipes clean, and reflects light so tight corners look brighter.
Look for formulas with built-in Moisture barriers and additives for mold prevention, especially if you don’t have a strong exhaust fan. Prep matters: wash off soap film, degloss shiny walls, patch dings, then spot-prime stains to block bleed-through.
Keep colors space-smart—soft whites, warm greiges, or muted blue-greens read fresh without shrinking the room. Paint the ceiling too if it’s prone to spots.
Use crisp cut lines around trim for a tailored, updated look.
Try Peel-And-Stick Panels
If you want the look of tile or beadboard without the mess, peel-and-stick panels give your bathroom walls a fast, space-smart upgrade. You’ll get crisp lines and texture in a weekend, and you won’t lose precious square footage like you can with backer board or thick trim.
Start with a smooth, clean, dry wall; wipe with degreaser and let it fully dry so adhesion lasts. Measure twice, snap a level line, then work from one corner, pressing out air as you go. Use a utility knife for outlets and tight returns.
Choose light neutrals or micro-patterned “stone” to brighten small baths, or go vertical slats to visually lift ceilings. With peel and stick panels, bathroom wall transformations look custom, not temporary.
Refresh the Bathroom With Towels, Mats, and Decor
Even on a tight footprint, you can make the room feel newly finished by swapping in coordinated towels, a low-profile bath mat, and a few intentional decor pieces.
Pick a two-tone palette—like oat and charcoal or sage and cream—to echo tile and fixtures without visual noise.
Upgrade to plush, hotel-weight towels and fold them uniformly for instant polish.
Tight on space? Add slim Towel storage: an over-door bar, a floating shelf, or a narrow ladder that keeps stacks vertical.
Choose a quick-dry mat with a flat weave to avoid bulky edges and to fit under doors.
Finish with decorative accents: an amber soap pump, a small tray for daily essentials, and one framed print or sconce-adjacent vase.
Keep surfaces edited.
Deep-Clean, Re-Caulk, and Re-Grout for a “New” Bathroom
Fresh towels and edited decor read instantly upgraded, but nothing makes a bathroom feel truly “new” like resetting the hard surfaces. Start with deep cleaning: hit tile, tub, and vanity with a non-abrasive cleanser, then detail the corners using a grout brush and a toothbrush for tight seams. Rinse well and dry everything so moisture doesn’t hide issues.
Next, slice out failing caulk with a utility knife, wipe with alcohol, and re-caulk with a crisp silicone bead—think hotel-clean lines, not chunky waves.
For grout reconditioning, use an oxygen bleach paste or a grout renew colorant to even tones and erase staining. Seal grout once it’s cured to keep it bright longer.
You’ll sharpen edges, lighten the room, and make small baths feel larger.
Frequently Asked Questions
Do I Need Permits for Small Bathroom Updates Like Lighting or Fixtures?
You usually don’t need permits for Bathroom lighting swaps or Fixture replacements if you’re not moving wiring or plumbing. But you’ll need one if you add circuits, relocate lines, or alter ventilation—check local codes.
How Can I Update a Bathroom Without Damaging Rental Walls or Tile?
Treat your bathroom like a blank canvas: you’ll refresh it without damage by using removable wall decals, peel-and-stick hooks, tension shelves, and stylish Decorative accessories. Swap textiles, add LED vanity strips, and use suction storage for tile.
Which Upgrades Add the Most Resale Value in a Bathroom?
You’ll add the most resale value by upgrading to luxury fixtures, installing trendy tiles in a small accent zone, improving lighting layers, rejuvenating vanity storage, and adding efficient ventilation—buyers notice polished finishes, smart layouts, and lasting performance.
How Do I Prevent Mold and Moisture Problems After Cosmetic Updates?
Seal moisture like a tight lid: run your fan 20 minutes post-shower, squeegee glass, fix leaks fast. Choose mold resistant paint, prioritize Ventilation upgrades, caulk edges, and keep towels off floors for airflow.
What Bathroom Materials Are Best for Humid Climates and Poor Ventilation?
Choose porcelain Bathroom tile, epoxy grout, fiberglass surrounds, PVC trim, and mildew-resistant paint; skip MDF. Add Ventilation solutions: a quiet high-CFM fan, humidity-sensing switch, and slim transom vent, maximizing airflow without crowding.
Conclusion
You don’t need a full reno to get a big bathroom glow-up—just smart swaps. Choose upgrades that match your time and budget, then start with high-impact basics: sleek hardware, warmer-brighter lighting, and a modern mirror that bounces light and visually expands the room. Add moisture-resistant paint or peel-and-stick accents for on-trend texture. Finish with coordinated towels and decor, then deep-clean, re-caulk, and re-grout—polish, not chaos.