Table of Contents
For a small kitchen, you’ll get the best results with a low-profile, diffused LED flush mount (≤6 in. drop), CRI 90+, and 3000–3500K for accurate color and comfortable contrast. Size it by adding room length + width (ft) and using that number in inches (8’×10′ ≈ 18″). Target 20–30 lm/ft² ambient and 30–50 fc on counters, and offset the fixture 12–18 in. from cabinets to cut shadows. Next you’ll see layout-specific placement tips and common mistakes.
Best Flush Mounts for Small Kitchens (By Style)
If you’re lighting a small kitchen, you’ll get the best results by matching flush-mount style to function. Choose low-profile LED disks for even ambient light; target 35–50 foot-candles on work surfaces per IES guidance when combined with task lighting.
For a modern look, pick edge-lit panels with a 90+ CRI and 3000–3500K to keep finishes accurate.
For traditional rooms, use drum shades with diffusers to control glare and maintain a UGR-conscious, comfortable field.
In humidity-prone kitchens, specify damp-location rated fixtures (UL/ETL) and sealed lenses that limit grease ingress.
Prioritize Energy efficiency: look for ENERGY STAR or ≥90 lm/W and 0–10V dimming.
For innovative installation, use selectable CCT drivers and slim junction boxes to fit tight joists.
Flush Mount vs Semi-Flush: Which Saves Space?
Although both sit close to the ceiling, a true flush mount saves the most space because its canopy and lens typically project only ~0.75–2 in (20–50 mm), which helps you preserve headroom and keeps the luminaire outside the “bump zone” in tight aisles or over a peninsula.
Choose flush mounts when you’re prioritizing clearance under low ceilings or meeting typical 7 ft (2.13 m) minimum headroom expectations in circulation paths.
Semi-flush fixtures hang lower on a short stem, so they consume more vertical clearance but can improve light distribution by reducing ceiling “hot spots” and increasing lateral spread.
You’ll also gain Design versatility with visible hardware and layered shades.
Expect higher installation complexity with semi-flush units due to heavier assemblies, stricter bracing needs, and tighter leveling tolerances.
How Big Should a Flush Mount Be?
Size your flush mount to the kitchen’s dimensions so the fixture’s diameter and lumen output fit the room’s footprint and task needs.
If your ceiling is low, choose a thinner profile and keep adequate clearance above walking paths and cabinet doors to meet safety and usability expectations.
You’ll get better uniformity and fewer shadows when the fixture scale and mounting height align with the space.
Match Fixture Size To Room
Because a flush mount sits tight to the ceiling and spreads light broadly, you need to scale it to the room’s footprint rather than picking a diameter by guesswork.
Use the common sizing rule: add kitchen length and width (in feet) and convert that sum to inches for an appropriate fixture diameter. For example, a 10′ × 12′ kitchen targets about a 22″ flush mount; an 8′ × 10′ space targets about 18″.
If you’re installing two fixtures, split the target area and choose smaller diameters that still meet your lumen plan.
Aim for roughly 20–30 lumens per square foot for ambient output, then select LED wattage accordingly for Energy efficiency.
Keep Decorative accents secondary to photometrics and coverage.
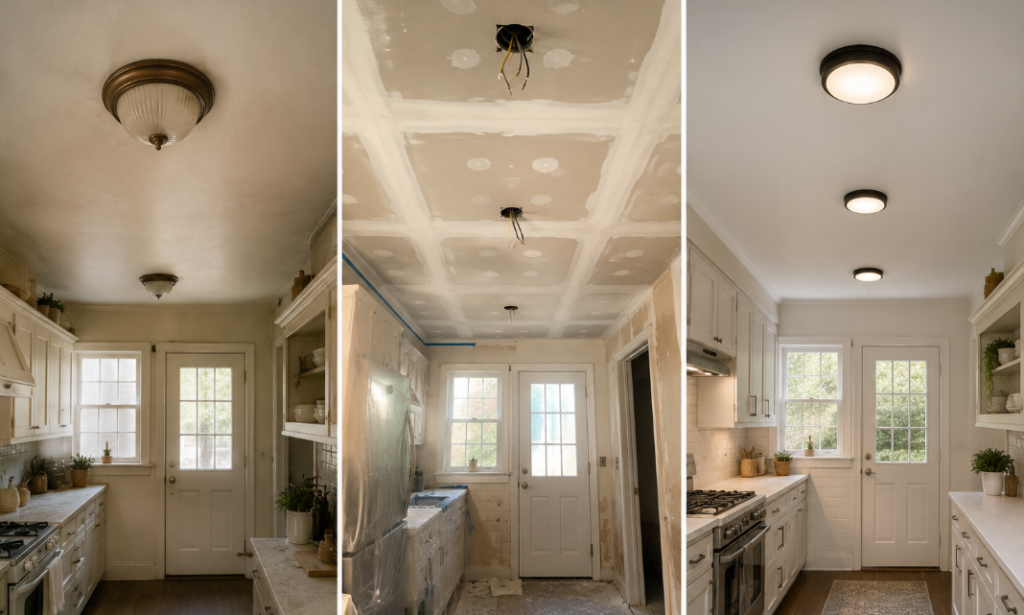
Consider Ceiling Height Clearance
Two measurements—ceiling height and fixture drop—set the hard limit on how big your flush mount can be in a small kitchen. Start by measuring finished floor to finished ceiling, then subtract the fixture’s total projection (canopy plus shade plus any decorative finial). What remains is your Ceiling clearance.
You’ll want to meet practical Headroom requirements: keep the bottom of the luminaire high enough that tall users won’t feel it overhead and cabinet doors won’t visually clash.
In most kitchens, that means choosing a true flush or low-profile “hugger” when ceilings run 8 feet, and reserving deeper bodies for 9-foot ceilings and up.
If you can’t maintain comfortable clearance, downsize diameter or switch to recessed/wafer lighting instead.
Flush Mount Brightness: Lumens and Color Temp
Although flush mounts sit close to the ceiling, you can still hit proper task-level illumination in a small kitchen by specifying the right lumens and correlated color temperature (CCT). Target 30–50 foot-candles on countertops; as a quick rule, plan roughly 20–30 lumens per square foot for ambient, then add task lighting as needed.
Compare products by delivered Light output (not “equivalent watts”) and check IES LM-79 reports when available.
For Color temperature, choose 3000K for warmer finishes or 3500–4000K for a cleaner, higher-contrast prep feel; keep all sources matched to avoid patchy color.
Specify CRI 90+ for accurate food appearance, and consider dimming with a CCT-stable driver so you don’t shift too warm at low levels.
Where to Place Flush Mounts in a Small Kitchen
Even if your ceiling height and cabinet layout limit fixture options, you can still get uniform, glare-controlled light by placing flush mounts where they support the work triangle and minimize shadows on primary task zones.
Center one fixture over the sink run or main prep counter, offset 12–18 inches from upper cabinets so your body doesn’t block light onto the work surface. In galley kitchens, align fixtures on the aisle centerline to balance both counters.
For L-shapes, place a second unit near the corner leg to prevent a dark junction. Treat the range as its own task area: keep a flush mount outside the hood’s capture zone to reduce flicker and heat exposure.
Use separate switching for lighting zones (prep/clean/ambient).
Flush Mounts by Ceiling Height (8′, 9′, 10′)
Match your flush mount to ceiling height so you hit target workplane illuminance without glare or head-clearance issues.
With 8′ ceilings, you’ll typically choose low-profile, wide-distribution flush mounts.
At 9′, you can use balanced semi-flush forms that maintain uniform spacing and cutoff control.
At 10′, you can scale up to statement fixtures, but you’ll still size the canopy and optics to keep UGR low and light levels consistent across the small kitchen.
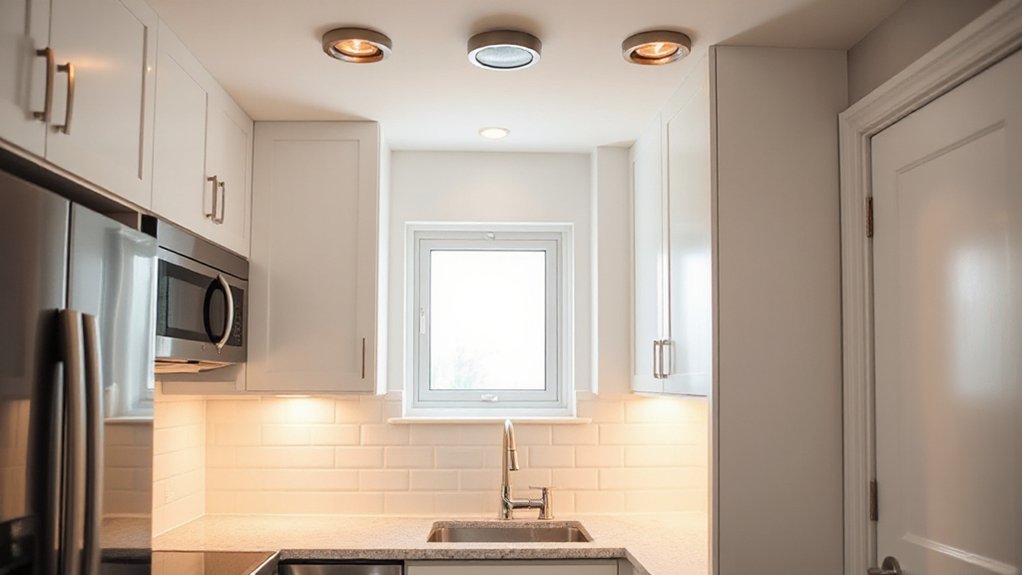
Best Flush Mounts For 8′
When you’re working with an 8-foot ceiling, you need a flush mount that controls glare and maintains clearance while still delivering task-appropriate light levels for prep and cleanup. Choose a low-profile LED flush or semi-flush (≤4 in. drop) with a diffused lens and 90+ CRI to keep color accurate on countertops.
Target 30–50 foot-candles on work surfaces by pairing the fixture with under-cabinet lighting, not a decorative pendant that steals headroom. Specify 2700–3000K for comfort, or 3500K if you want a cleaner look.
Look for 1,500–3,000 delivered lumens, dimmable to 10%, and a wet/damp rating near sinks. If you like vintage fixtures, pick shallow drum or prismatic-glass styles with shielded LEDs.
Balanced Options For 9′
With a 9-foot ceiling, how do you balance visual presence with controlled glare and usable task light? Choose a low-profile flush mount with a wide diffuser and a regressed LED or louver to reduce UGR and direct-view brightness.
Target 30–50 footcandles on counters by pairing 1,800–2,400 delivered lumens overhead with under-cabinet lighting. Keep spacing about 4–6 feet to limit scalloping.
Select 3000–3500K, 90+ CRI to support accurate food prep and color coordination with cabinets, stone, and paint.
Prioritize energy efficiency: look for high-efficacy LEDs (≥80 lm/W), dimmable drivers, and Title 24/ENERGY STAR compliance.
Use a wall dimmer to keep ambient light comfortable during evening use.
Statement Flush Mounts For 10′
A 10‑foot ceiling gives you more vertical separation, so you can use a statement flush mount that reads as a design feature without pushing glare into the primary sightline.
Target a 16–22 inch diameter fixture with a diffused lens and a wide beam to keep luminance controlled at eye level.
Specify 2700–3000K, 90+ CRI, and 1,600–2,400 lumens for a small kitchen, then pair it with undercabinet task lighting to meet typical 30–50 fc on counters.
Choose a dimmable, high‑efficacy LED (≥90 lm/W) for energy efficiency and lower heat load.
Add Decorative accents through mixed metals or prismatic glass, but keep the profile tight (<6 inches) to maintain clearance and visual balance.
Best Flush Mount Finishes for Small Kitchens
Three finish categories—high-reflectance metals, low-glare dark tones, and color-matched neutrals—deliver the most reliable performance in a small kitchen because they control reflectance, contrast, and perceived ceiling height.
You’ll get the cleanest photometric results when your Finish options support high diffuse reflectance at the ceiling plane and limit veiling reflections at eye level.
Choose brushed nickel, polished chrome, or satin brass if you need maximum ambient bounce; specify satin or brushed sheens to meet typical glare-control expectations.
Use matte black, oil-rubbed bronze, or gunmetal when you want fixtures to visually recede and reduce perceived clutter, but pair with higher lumen output.
For seamless integration, match white, warm white, or cabinet-tone finishes to minimize contrast.
Your Material choices should prioritize corrosion-resistant plated steel, solid brass, or powder-coated aluminum for cleanability.
Pair Flush Mounts With Under-Cabinet Lights
Because a flush mount mainly supplies ambient light, you’ll get the most usable results in a small kitchen when you layer it with under-cabinet task lighting to hit common target levels—about 30–50 fc (300–500 lux) on countertops—without overdriving ceiling brightness or creating glare.
Choose under-cabinet LED bars or tape with high CRI (90+) and a neutral CCT (3000–3500K) so food prep reads accurately and your flush mount’s Decorative styles still stand out.
Put the under-cabinet run on a separate, dimmable circuit; you’ll tune ambient vs task by time of day and reduce veiling reflections on glossy counters.
Aim for continuous, shadow-free coverage by placing fixtures near the cabinet front.
This pairing boosts Energy efficiency by letting you dim the ceiling fixture lower.
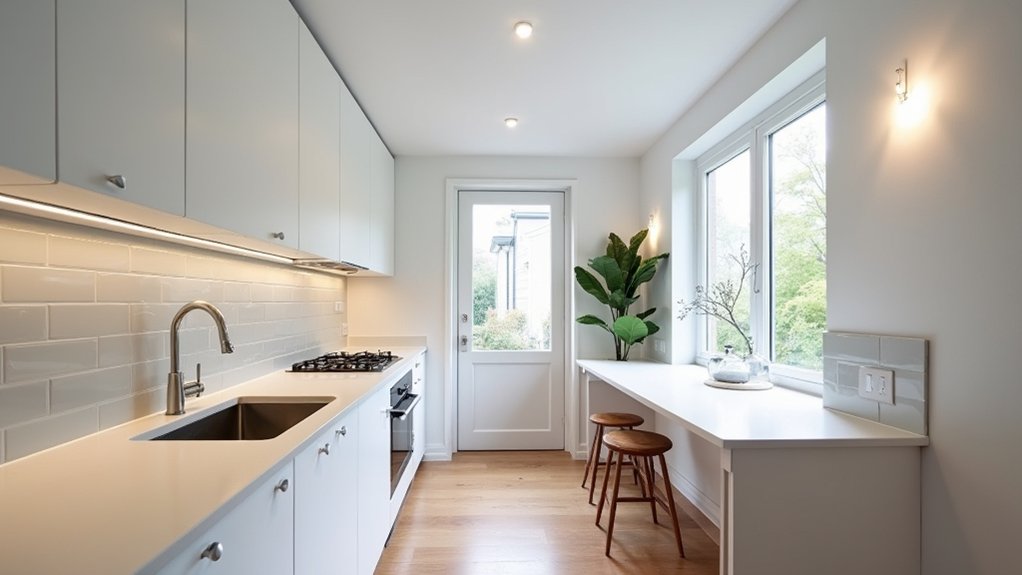
Layout-Specific Lighting Plans (Galley, L-Shape, U-Shape)
When you tailor flush-mount placement to your kitchen’s layout, you’ll hit target illuminance more consistently while minimizing shadows and glare.
In a galley, center a linear series on the aisle, spacing fixtures about 3–4 ft to maintain uniformity and aim for 30–50 fc on work surfaces (IES task guidance). Choose wide-distribution optics to wash both counters evenly.
In an L-shape, place one flush mount over each leg’s main prep zone and a third near the corner transition to prevent a dim pocket.
In a U-shape, use three evenly spaced fixtures aligned with the counter runs; keep the sink and range within the primary beam.
Add Decorative accents via trim rings, and select Material options (glass, acrylic, metal) that preserve high reflectance and cleanability.
Small-Kitchen Flush Mount Mistakes to Avoid
Although flush mounts suit tight ceilings and narrow aisles, you’ll get poor results fast if you treat them as “one-size-fits-all” fixtures. Don’t undersize output; target 30–40 lumens/ft² for ambient light and verify delivered lumens after diffuser losses.
Avoid “cool-white everywhere”: specify 2700–3000K, 90+ CRI for food prep, and keep SDCM tight to prevent color mismatch.
Don’t place a single center fixture; align multiple units over work zones and maintain uniform spacing to limit scalloping and shadows.
Don’t ignore glare; use frosted lenses and shielding angles suited to seated sightlines.
Don’t mix damp-location-rated Bathroom fixtures into dry ceilings, and don’t repurpose Outdoor lighting; match UL location ratings and IC/airtight requirements.
Frequently Asked Questions
What’s the Average Cost to Install a Flush Mount Kitchen Light?
You’ll typically pay $150–$400 to install a flush mount kitchen light, including labor. Add $30–$150 for dimming options and $20–$80 for code-rated boxes. You’ll improve energy efficiency with LED-rated fixtures.
Can I Use a Smart Bulb or Smart Switch With Flush Mount Fixtures?
Yes—you can use Smart bulbs or a smart switch with flush mounts, but verify socket type, fixture rating, and dimmer support. For Switch compatibility, confirm neutral availability, load type, and that you don’t control smart bulbs with smart switches.
Are Flush Mount Lights Safe to Install Over a Kitchen Sink?
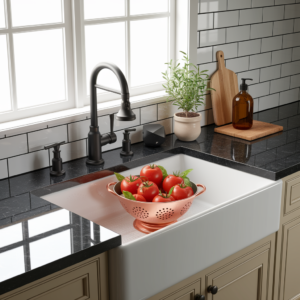
Yes, you can install flush mounts over a kitchen sink—measure twice, cut once. You’ll follow damp-location ratings, GFCI rules, and clearance. Match kitchen style and ceiling height, and use a sealed, corrosion-resistant fixture.
How Do I Clean a Flush Mount Light Without Damaging the Finish?
Turn power off, let it cool, and remove the diffuser. Use Cleaning techniques: microfiber cloth, pH-neutral soap, and distilled water; avoid abrasives and ammonia. Rinse, dry fully, and reinstall carefully for Finish preservation.
Do Flush Mount Kitchen Lights Attract or Trap Cooking Grease and Odors?
Yes—you don’t “attract” grease, yet you’ll catch it. Warm air deposits Grease buildup on lenses and trim; tight housings can increase Odor retention. Use venting, sealed-rated fixtures, and scheduled degreasing per manufacturer instructions.
Conclusion
You’ll get the best results in a small kitchen when you size flush mounts to your ceiling height and room footprint, then target 2,000–4,000 lumens with 3000–4000K LEDs for clean, accurate task visibility. Place fixtures on the work axis, not the walkway, and choose low-profile finishes that won’t visually compress the ceiling. Pair them with under-cabinet lighting to eliminate shadows. Why settle for glare or dark corners when a simple plan meets the standard?