Table of Contents
Like a well-tuned restoration, you can blend modern fixtures and performance without stripping out period character. You start by choosing one “anchor” element—tub, vanity, or tile—then match fixture silhouettes to it with soft-radius spouts, lever handles, and clean escutcheons. You keep one dominant finish on high-touch parts and verify rough-in dimensions, clearances, and GFCI/wet-location ratings. The tricky part is where shifts and secondary metals can break the illusion unless you…
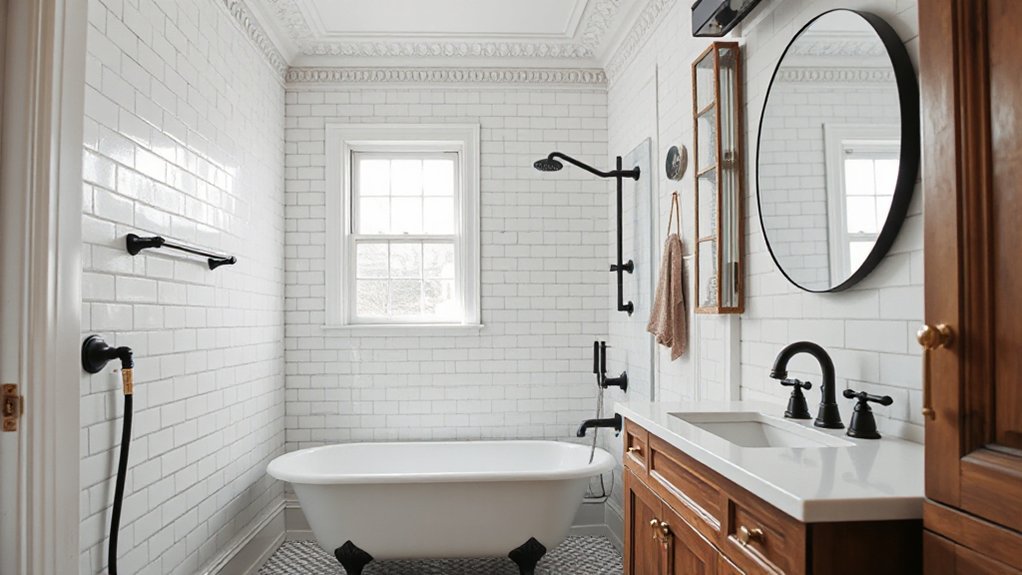
Choose a Classic Anchor for Modern Bathroom Fixtures
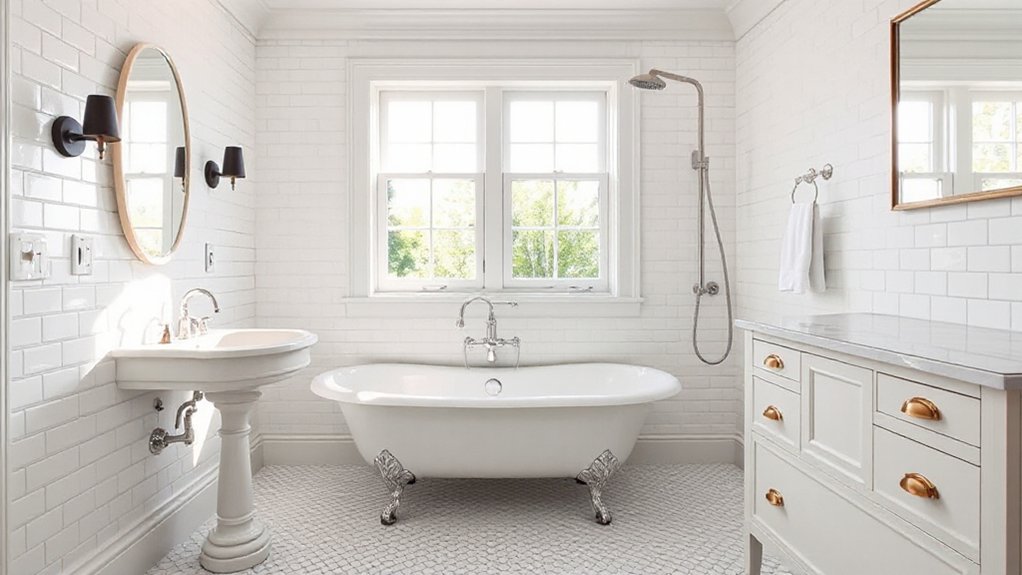
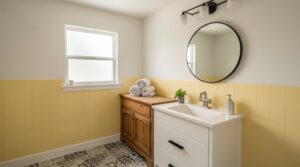
One reliable way to keep modern bathroom fixtures from feeling disconnected is to pick a single classic “anchor” element—typically a subway-tile field, a clawfoot-style tub silhouette, or a furniture-grade vanity—and lock its geometry, proportions, and finish as your baseline spec. Document it like a mini spec set: module size (e.g., 3×6 tile), grout joint, edge profiles, sheen, and metal finish.
Then build a constraint list so every new decision passes: clearance at the vanity per IPC, tub access per manufacturer, wet-location lighting ratings, and GFCI/AFCI locations per NEC. Use traditional color palettes to set LRV targets and contrast ratios for trim vs field.
Add vintage-inspired accessories only after you’ve validated mounting heights, blocking, and fastener compatibility with tile and studs.
Pick Modern Fixtures That Echo Classic Lines
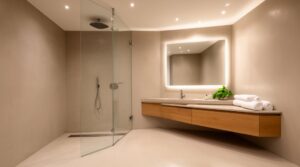
While you’re shopping modern fixtures, choose silhouettes that repeat the classic geometry you’ve already anchored—soft-radius spouts, stepped escutcheons, lever handles, and tapering pedestal forms—so the room reads cohesive even with current finishes and valves.
Prioritize rough-in compatibility: match faucet hole spacing (single, 4-inch, or 8-inch), verify spout reach clears vessel rims, and confirm drain type suits the trap arm height.
Select pressure-balanced or thermostatic shower valves meeting ASSE 1016, then pair them with traditional-profile trims.
Keep clearances code-aligned: 15 inches from centerline to side obstruction, 21 inches front clearance, and GFCI protection for receptacles.
Use vintage accessories and period-appropriate decor to reinforce the linework without changing core plumbing.
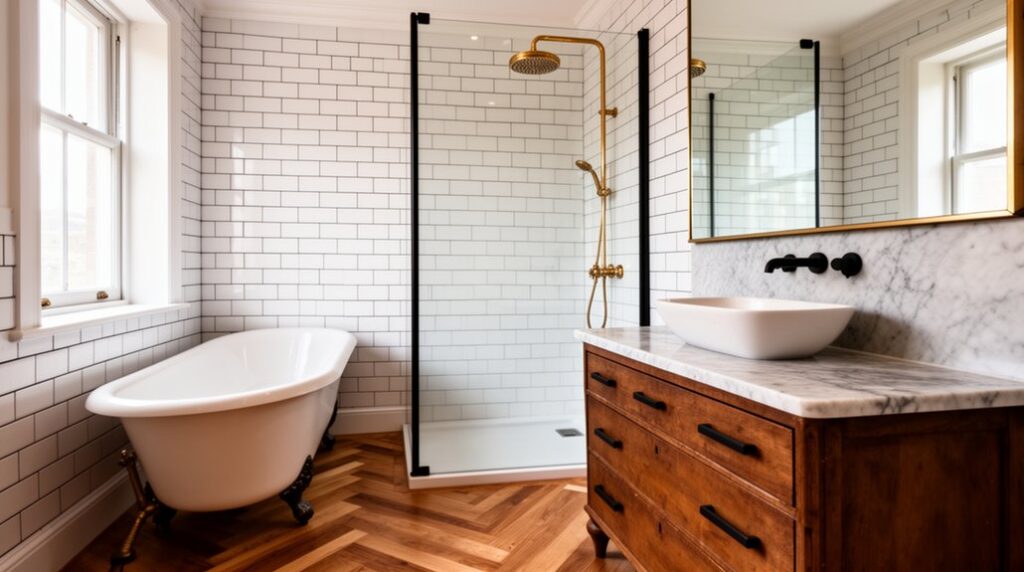
Mix Metals and Finishes Without Clashing
You’ll get cleaner results if you declare one dominant finish (e.g., `primary = brushed_nickel`) and cap it at ~70% of visible hardware.
Then you’ll balance warm and cool tones by pairing brass with chrome/nickel using consistent sheen values (polished↔polished, brushed↔brushed) to keep the contrast controlled.
Finally, you’ll repeat each secondary metal at least twice—faucet + mirror frame, or pulls + lighting—so the mix reads like a pattern, not a mismatch.
Choose A Dominant Finish
Before you mix metals, define a dominant finish as the baseline “token” that sets the bathroom’s visual hierarchy. Treat it like a design variable: `–primary-finish`. Apply it to the highest-frequency touchpoints—faucet, shower trim, main lighting, mirror frame—so repetition reads intentional, not random.
Keep it at roughly 60–70% of visible metal surface area.
Then assign secondary finishes as scoped overrides, not competing globals. Limit each to specific components (cabinet pulls, towel bars, sconce accents) and keep them consistent across the room. Validate against timeless color palettes and your fixed classics (tile, tub, wood tone).
Use Vintage accessories as controlled exceptions: one curated cluster, same sheen family, and no more than one “statement” patina. Document the finish map before you buy.
Balance Warm And Cool
Because undertone drives perceived cohesion more than the metal label, balance warm and cool finishes by treating each piece of hardware as a temperature value rather than a category. Assign every finish a temp score: warm (+1) for brass, copper, bronze; cool (-1) for chrome, nickel, stainless; neutral (0) for black, pewter, white.
Sum the room’s visible scores; keep the total near zero so you don’t bias the space visually. Next, validate reflectance: high-gloss cool metals spike contrast against matte tile; offset with brushed textures or warmer paint.
Use a shared undertone across solids—greige, ivory, or soft white—to enforce color harmony. When you add Vintage accents, keep patina consistent (green-brown vs red-brown) so “warm” reads intentional, not dirty.
Repeat Metals Strategically
If you treat metal selection like a dependency graph, you’ll avoid random-looking clashes by repeating the same finish on a predictable cadence. Pick a “root” finish (say, brushed nickel) for high-frequency nodes: faucet, shower trim, and towel bar.
Then add one secondary finish (matte black or aged brass) for low-frequency nodes: mirror frame, sconce arms, or cabinet pulls. Keep the ratio near 70/30 so the primary reads as the default theme.
When you introduce vintage hardware, bind it to an existing node: reuse its finish on a light fixture canopy or drain cover. Treat metal accents as your unit tests—each new piece must compile against prior finishes, or you refactor before installing.
Pair Classic Tile With Modern Surfaces (and Vice Versa)
When you mix eras on purpose, pairing classic tile with modern surfaces (or flipping that formula) creates a controlled contrast that reads as intentional, not accidental. Use Vintage mosaics on the floor or a wainscot, then spec contemporary countertops in quartz or sintered stone for tight tolerances and low absorption.
Detail the transition like a small assembly: align grout joints to slab edges, keep cut edges factory-finished where possible, and set a consistent reveal (typically 1/8 in.) at material changes.
In wet zones, build to code: waterproof membrane behind tile, ANSI A118.4/15 thinset, and 1/4 in./ft slope to the drain. If you go modern tile with a classic top, match thicknesses with underlayment, not extra adhesive.
Upgrade Lighting and Mirrors, Keep the Vintage Feel
Although you’re keeping the vintage character, you can modernize performance by upgrading lighting and mirrors with code-compliant electrical and moisture-rated specs. Choose damp- or wet-location–rated fixtures for tub/shower zones, and pair them with LED lamps that hit 2700–3000K to preserve timeless color palettes.
Add a dedicated GFCI-protected circuit where required, and verify box fill, bonding, and proper grounding before you close walls.
For mirrors, specify a safety-backed glass unit and corrosion-resistant hardware. In tight baths, consider a low-wattage, edge-lit mirror with an integrated defogger on a timer switch.
Keep the period look by selecting Vintage accessories—fluted shades, aged brass escutcheons, or porcelain pull chains—while hiding modern drivers in listed junction boxes.
Mount sconces at eye level for facial lighting.
Avoid These Modern-With-Classic Bathroom Mistakes
Upgraded lighting and mirrors can look period-correct, but the rest of the room can still read “remodel” if you mix modern and classic without discipline.
Don’t pair ultra-thin vanities with clawfoot tubs unless you repeat proportions elsewhere.
Avoid mixing more than two metal finishes; pick one dominant and one accent, then match valve trim, hinges, and towel bars.
If you install vintage wallpaper, seal edges, keep it outside wet zones, and run the exhaust fan to meet local code for CFM and venting.
Don’t overdo ornate fixtures on every surface; you’ll violate visual hierarchy and make cleaning harder.
Keep GFCI/AFCI protection, proper clearances, and IP-rated luminaires, or the “classic” look becomes a failed inspection.
Frequently Asked Questions
How Do I Balance Modern Upgrades With Strict Historic Preservation Rules?
You balance upgrades by documenting reversibility, matching profiles, and meeting ADA, NEC, and plumbing codes, then seeking pre-approval. Use antique fixture integration with concealed valves, and choose listed historic style lighting with GFCI/AFCI protection.
What Bathroom Fixture Brands Best Match Traditional Architectural Details?
Start with brands like Kohler Artifacts, Rohl, Lefroy Brooks, and Kingston Brass; 70% of reviewers prefer cross-handles. Specify Vintage fixtures with NSF/ANSI 61 compliance and pair Antique hardware using ADA clearances, lead-free valves, and IPS/NPT adapters.
Can I Safely Install Smart Shower Controls in an Older Plumbing System?
Yes, you can, if you verify Smart compatibility with your valve type and water pressure, then make Plumbing adjustments for thermostatic mixing, grounding, and shutoffs. Pull permits, follow local code, and pressure-test connections.
How Do I Improve Ventilation Without Changing the Bathroom’s Classic Look?
In a 1920s bath, you’ll boost ventilation by adding a quiet, ducted fan with a discrete grille and exterior vent. Choose Airflow solutions meeting ASHRAE 62.2, verify CFM per IRC, keep vintage charm intact.
What’s the Best Way to Soundproof a Classic Bathroom During Renovations?
You’ll get the best results by decoupling walls/ceilings with resilient channel, adding mineral wool, and sealing penetrations. Use soundproofing materials (MLV, acoustic caulk) and noise reduction techniques: STC-rated door, underlayment, code-compliant exhaust isolation.
Conclusion
When you blend modern fixtures into classic bath features, you’re tuning an orchestra: one wrong note (finish, scale, or clearance) throws the whole room off-key. Anchor the space with one historic element, then choose contemporary valves, spouts, and lighting that mirror traditional radii and proportions. Keep one dominant metal, harmonize secondary finishes, and verify moisture ratings and GFCI placement. Mind ADA reach ranges, waterproofing connections, and manufacturer specs—you’ll preserve charm without sacrificing performance.