Most people don’t realize your biggest garage-gym limiter isn’t equipment—it’s clearance and load paths, which decide what you can safely install. You’ll get better results by zoning the space for lifting, cardio, and mobility, then measuring walkways and overhead height before you buy anything. Add impact-rated rubber flooring, bright lighting, and reliable airflow so the room stays usable year-round. Next comes the gear and anchoring choices that prevent costly mistakes…
Plan Your Garage Gym Layout (Racks, Clearance, Zones)
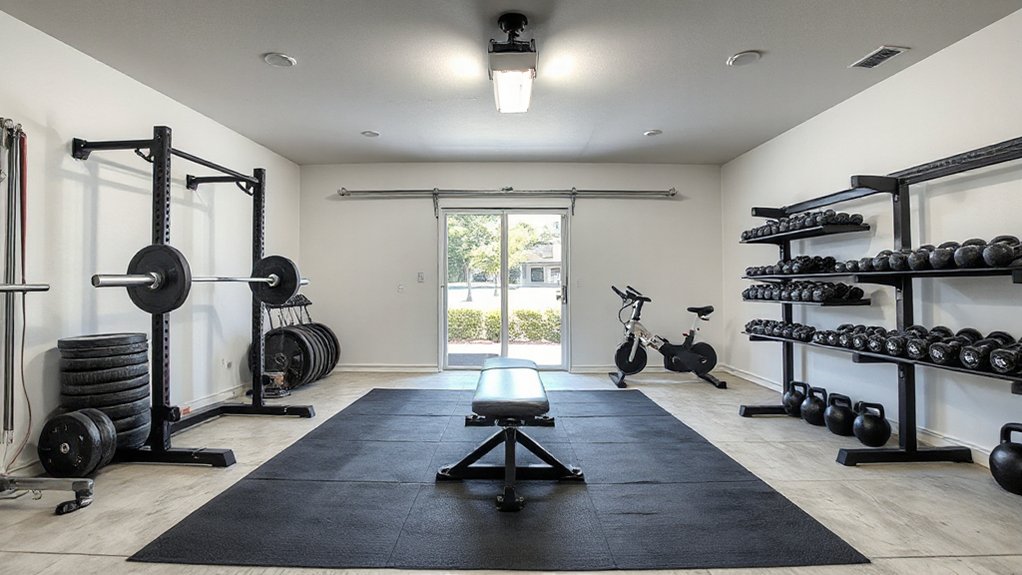
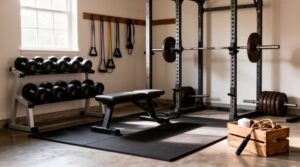
Before you buy equipment, map your garage gym around the rack and the space you’ll actually move in. Place the rack where you can keep 3–4 feet of side clearance and a clear bar path front-to-back, and confirm ceiling height for overhead pressing and pull-ups.
If you park a car, use tape to mark a “no-gear” lane so loading and unloading stay safe.
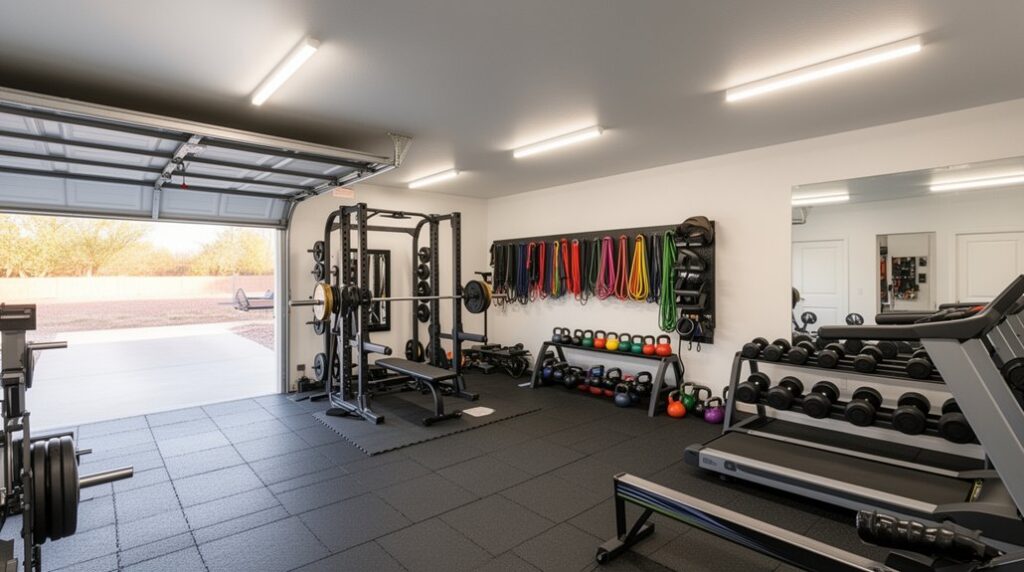
Build zones: rack and barbell work near wall studs, a small open zone for carries and warm-ups, and a storage zone that keeps plates and dumbbells off walkways.
Upgrade garage lighting so you can see J-cups, safeties, and collars clearly.
Pick ventilation options (fan, cracked door, exhaust) to limit heat and improve grip.
Choose Garage Gym Flooring (Mats vs Tiles vs Rolls)
Because your floor takes every dropped plate and sweaty pivot, you should pick it like safety gear: match the material to your lifting style, slab condition, and moisture level.
For heavy barbell work, use dense rubber mats (3/8–3/4 in) to cut impact and reduce slip; layer plywood beneath if your slab’s uneven.
Interlocking tiles install fast and let you replace damaged sections, but seams can separate under sleds or sharp turns.
Rubber rolls create fewer seams and clean easily, yet they’re harder to move and need careful cutting.
Among garage flooring options, prioritize thickness, traction, and low odor.
Flooring installation tips: clean and degrease concrete, fix cracks, test for moisture, leave expansion gaps, and tape seams where needed.
Dial In Garage Gym Comfort (Lighting, Airflow, Heat)
Solid flooring gives you a stable base, but comfort controls whether you’ll train consistently and safely in a garage. Start with ambient lighting: aim for bright, even illumination to reduce missteps and improve form checks. Add an overhead LED fixture plus a task light near racks or mirrors, and keep cords off the floor.
Next, prioritize airflow. Ventilation improvements like a box fan in the door, a ceiling fan, or a vented exhaust fan help clear heat, fumes, and moisture that can raise slip risk and corrode gear. If you park cars inside, never run engines while training.
For temperature, use an electric space heater with tip-over and overheat shutoffs, or an insulated mini-split if you train year-round. Seal gaps, add weatherstripping, and monitor humidity.
Pick Garage Gym Equipment by Goal and Budget
If you match your equipment to your training goal and your realistic budget, you’ll get better results with fewer purchases and less risk.
Start by naming your primary outcome: strength, hypertrophy, conditioning, or general fitness.
For strength and muscle, prioritize a barbell, plates, and an adjustable bench; research supports progressive overload and compound lifts.
For conditioning, choose a compact cardio tool (jump rope, kettlebell, or rower if space allows) plus a timer.
For mixed training, add a pull-up option and adjustable dumbbells to reduce footprint.
Protect joints by buying stable, load-rated gear and checking equipment durability (welds, knurling, sleeve spin, padding density).
Use brand comparisons to weigh warranties, tolerances, and replacement parts against price.
Buy used when safe.
Add Garage Gym Storage and Safety (Organization, Anchors)
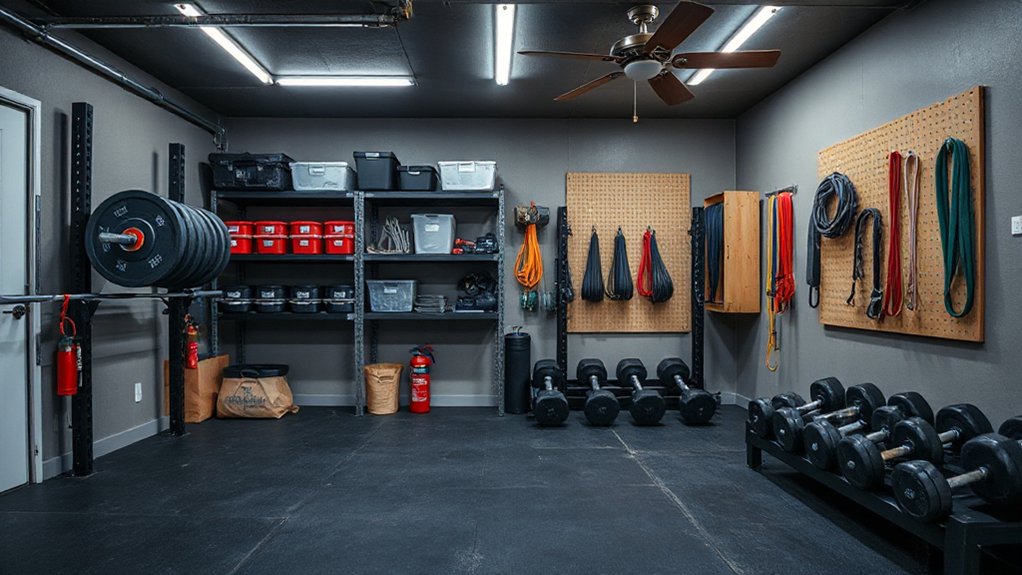
Once you’ve picked equipment that fits your goals and budget, set up storage and safety so you can train without tripping hazards or unstable loads. Start by mapping zones: lifting, cardio, and mobility, then keep walkways clear.
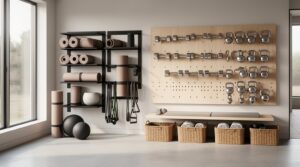
Use vertical storage solutions—wall-mounted plate pegs, a barbell rack, and shelving for bands and collars—to save floor space and reduce clutter. Add labeled bins for small items so you don’t leave them on benches.
For safety measures, anchor your rack to concrete per manufacturer specs, or use a rated bolt-down kit; check torque and re-tighten monthly. Secure pull-up bars and rings to joists with appropriate lag bolts.
Install rubber flooring to improve traction and protect the slab. Keep a fire extinguisher and first-aid kit accessible.
Frequently Asked Questions
How Do I Soundproof My Garage Gym to Avoid Bothering Neighbors?
Use soundproofing techniques: seal door gaps, add weatherstripping, and install mass-loaded vinyl. Lay rubber flooring and lift-platform pads as noise reduction materials. Mount insulation and double drywall. Secure fixtures and avoid blocking ventilation.
Do I Need Permits or HOA Approval to Convert My Garage Into a Gym?
Often yes—like Icarus, don’t fly past your HOA: you’ll likely need HOA approval and permits if you change electrical, plumbing, structure, or use. Check local codes; keep Garage organization, Equipment maintenance, and safety logs.
How Can I Prevent Rust on Equipment in a Humid Garage?
Prevent rust by prioritizing Humidity control: run a dehumidifier (aim 40–60% RH), improve airflow, and fix leaks. For Equipment maintenance, wipe sweat, apply light oil, store off concrete, and inspect fasteners monthly.
What Insurance Coverage Should I Have for a Home Gym in My Garage?
You should review your homeowners or renters Insurance policies and add an endorsement for gym equipment, plus liability coverage for injuries. If clients train, get a business rider. Document values, require waivers, follow safety standards.
How Do I Keep Pests and Rodents Out of My Garage Gym?
Seal gaps with steel wool and caulk, add door sweeps, and store food sealed. You’ll boost pest prevention and rodent control by removing clutter, using covered bins, setting snap traps safely, and scheduling inspections.
Conclusion
Like Odysseus charting a course, you’ll turn your garage into a gym by planning zones, preserving rack clearance, and protecting joints with dense rubber flooring. You’ll keep performance high with bright, even lighting and steady airflow or heat control. You’ll buy only what fits your goals and budget, prioritizing proven staples over gimmicks. You’ll lock in safety with storage, clear walkways, anchored equipment, and basic fire gear.