You can’t treat exterior upkeep as optional if you want to control moisture and structural risk. Start with a season-by-season checklist: inspect shingles, flashing, and penetrations after storms; clear gutters and verify downspouts discharge well away from the foundation; seal cracks and replace failed caulk at joints; wash siding, windows, and decks to limit mold and rot; trim vegetation and correct grading for positive slope. Miss one step, and the failure mode is predictable…
Follow a Season-by-Season Exterior Maintenance Checklist
Because weather loads change throughout the year, you should use a season-by-season exterior maintenance checklist to align inspections and repairs with the conditions most likely to cause damage.
In spring, clear gutters, verify downspout discharge away from foundations, and grade soil to maintain positive slope. Apply landscaping ideas that keep mulch and plantings 150 mm below cladding.
In summer, wash siding, inspect caulked joints at penetrations, and confirm exterior lighting is sealed, GFCI-protected, and aimed to reduce glare.
In autumn, clean debris from drains, verify window weeps are open, and test hose bibb shutoffs.
In winter, remove ice buildup at walkways, monitor freeze-thaw cracking in masonry, and assure snow storage won’t block vents or exits.
Document findings and close corrective actions promptly.
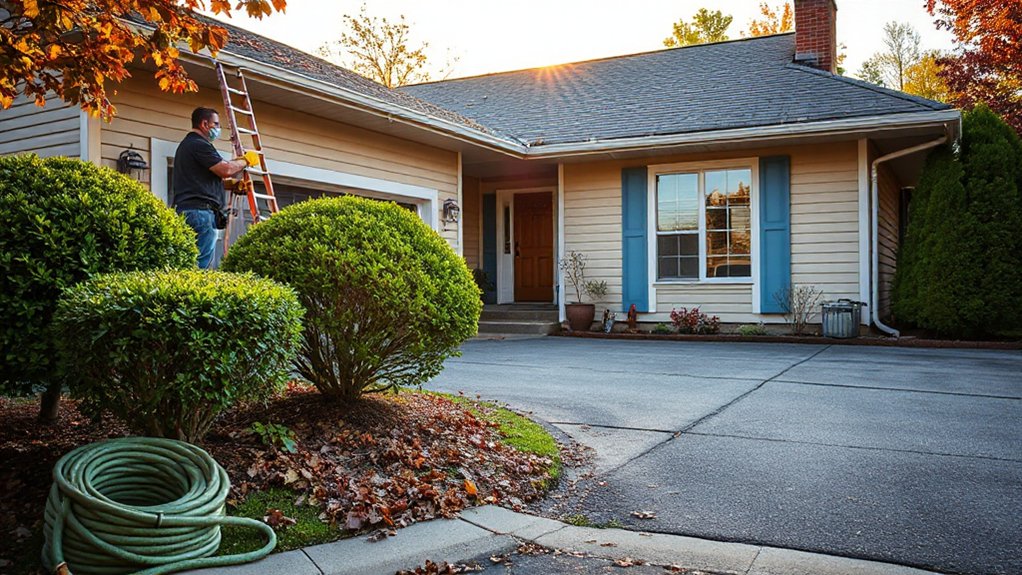
Inspect Roof and Flashing (Exterior Maintenance After Storms)
Storms can undo a full season of routine checks in minutes, so you should inspect the roof covering and all flashing details as soon as it’s safe. Begin your storm damage inspection from the ground with binoculars, then access the roof only with proper fall protection and a stable ladder.
Look for missing, creased, or lifted shingles/tiles, exposed fasteners, punctures, and granule loss. Check ridge caps and hip lines for displacement.
At all penetrations, verify flashing laps shed water (shingle-style), sealant isn’t split, and counterflashing is secure. Inspect step flashing at sidewalls for corrosion, gaps, or nail pop-through.
If you find deformation or open joints, schedule flashing repair promptly and require compatible metals and manufacturer-approved details. Document photos and locations for follow-up and claims.
Clean Gutters and Extend Downspouts (Exterior Drainage)
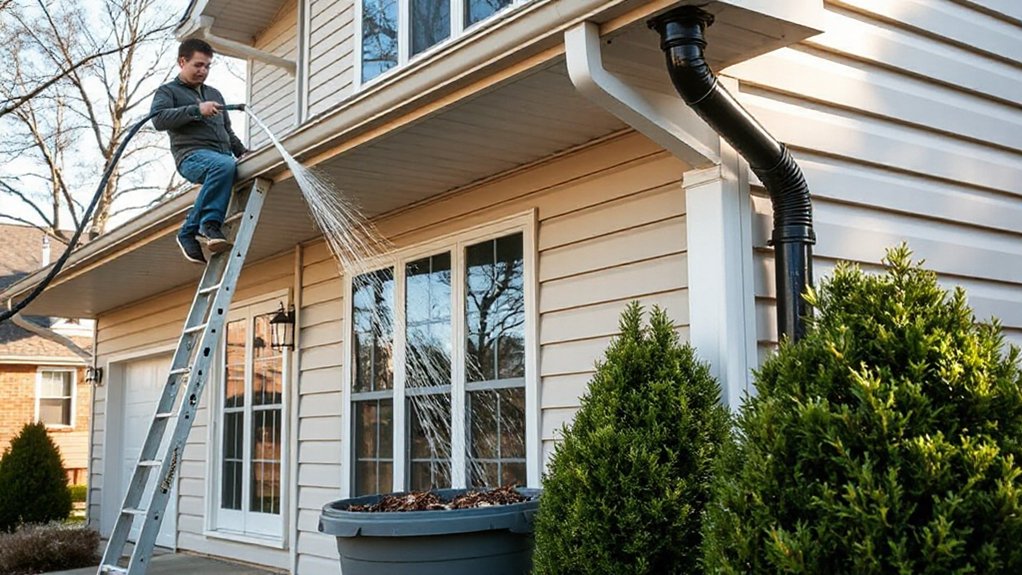
You should clear gutters and downspout inlets of leaves, granules, and sediment so roof runoff doesn’t back up under shingles or overflow onto fascia and siding.
You should also verify hangers, seams, and end caps are secure, then flush with water to confirm continuous flow to each outlet.
You can reduce foundation wetting by extending downspouts to discharge several feet away on a positive slope or into an approved drain line so runoff is directed away from the building envelope.
Prevent Water Damage
Where does all that roof runoff go once it hits the eaves? If gutters clog, water overtops the fascia, saturates sheathing, and drives moisture into soffit vents and wall assemblies.
You should clean gutters at least twice yearly and after major storms, then verify hangers hold a consistent slope toward outlets. Flush with a hose to confirm continuous flow and check for leaking seams, corrosion, or loose end caps.
Extend downspouts so discharge doesn’t pond at the foundation and back up into the building envelope.
Inspect adjacent Waterproofing membranes at roof edges and wall interfaces for laps, punctures, and UV degradation.
Confirm your Drainage systems remain unobstructed at inlets and leader connections, and seal penetrations to maintain a continuous water-resistive barrier.
Improve Runoff Direction
Roof runoff control doesn’t stop at preventing overflow; it also depends on directing discharge away from the structure.
Clean gutters at least twice yearly and after storms so water can move to outlets without ponding. Verify gutter slope toward downspouts and keep hangers secure to maintain continuous fall.
Extend each downspout to discharge at least 1.8 m from the foundation, or connect to an approved solid leader to daylight. Use splash blocks or tightline piping to form runoff channels that won’t erode soil.
Add Drainage barriers such as gravel strips, edging, or diverters where flows cross walkways or beds.
Confirm final grade slopes away from walls and keep outlets clear of leaves and ice year-round.
Seal Exterior Cracks and Failed Caulk to Block Water
Although small gaps can look harmless, exterior cracks and failed caulk joints often create direct capillary pathways for bulk water intrusion and wind-driven rain. You should inspect changes at window/door trim, siding-to-flashing interfaces, penetrations, and control joints at least annually and after severe weather.
Probe for adhesion loss, brittleness, and open caulk gaps, because even hairline openings can initiate water infiltration behind cladding. Remove failed sealant to sound substrate, clean and dry the joint, then apply a compatible elastomeric sealant rated for exterior exposure (ASTM C920) and joint movement.
Maintain proper joint geometry with backer rod to achieve a 2:1 width-to-depth ratio, and tool for full contact. Seal cracks with appropriate masonry or epoxy fillers, then monitor for recurrence.
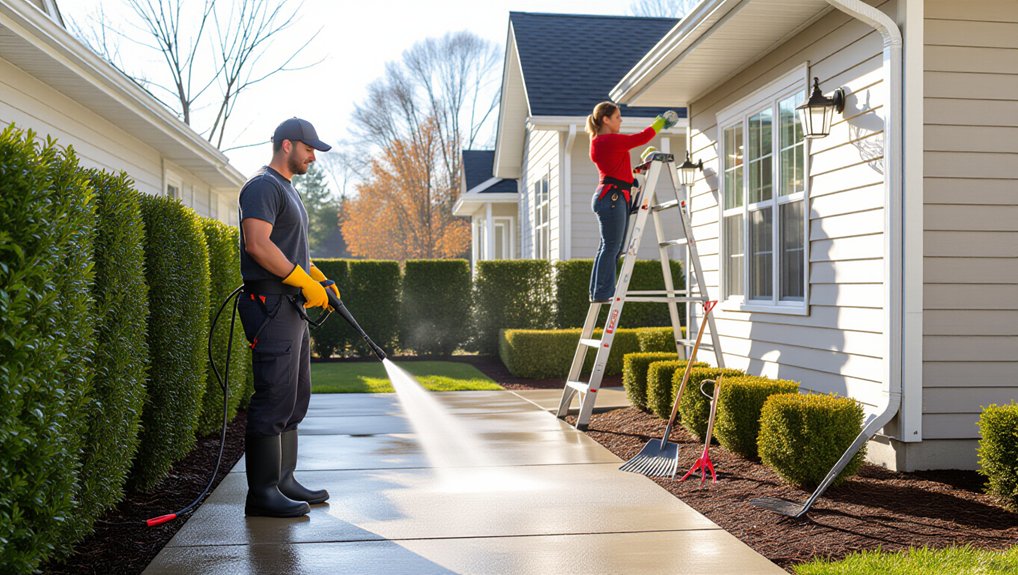
Wash Siding, Windows, and Decks to Prevent Rot and Mold

Keeping water out with sound caulk and crack repairs works best when you also remove the organic film that holds moisture against exterior materials. Wash siding annually, and sooner on shaded elevations, using a low-pressure rinse and a soft brush; avoid high-pressure jets that can drive water behind lap joints or erode fiber-cement edges.
Apply an exterior cleaner labeled for Algae prevention, keep dwell time per manufacturer instructions, then rinse top-down.
For windows, clean frames, weeps, and sill pans so drainage paths stay open; don’t flood glazing seals.
On decks, scrub between boards, clear debris at ledger interfaces, and rinse thoroughly to reduce rot fungi and surface mold.
Finish with spot priming or touch-up where coatings are thin for paint preservation.
Trim Trees and Fix Grading to Move Water Away
Trim back overhanging branches to maintain code-compliant clearances from the roof, siding, and service conductors, and to limit abrasion and storm damage.
Remove or mitigate root hazards that heave walks, crack driveways, or encroach on foundation drains, and don’t ignore surface roots that create trip points.
Regrade soil to establish positive drainage away from the foundation (typically about 6 in. fall over the first 10 ft), and keep finished grade below siding and weep screeds to reduce moisture intrusion.
Prune Overhanging Branches
When tree limbs extend over your roofline or within about 10 feet of siding, you should prune them back to maintain clearance and reduce abrasion, impact, and pest pathways.
Use ANSI A300 principles for tree pruning: remove dead, cracked, and crossing limbs first, then shorten over-extended branches with reduction cuts to a lateral at least one-third the diameter.
For branch trimming, avoid flush cuts and leave the branch collar intact to support proper compartmentalisation.
Keep limbs clear of gutters, chimney caps, and service drops; call a qualified arborist for work near conductors.
Schedule pruning outside peak storm seasons and after leaf drop when structure is visible.
Disinfect tools between trees to limit pathogen transfer.
Recheck clearance annually and after major wind events.
Remove Tree Root Hazards
Because shallow, surface roots can heave walkways, crack driveways, and interfere with perimeter drainage, you should identify and correct root-related trip hazards early while also directing roof and site runoff away from the foundation.
Map lifted slabs and settled edges, then expose roots carefully to confirm Root intrusion before you cut anything. Keep cuts outside the structural root zone where practicable, and use clean, sharp tools to limit decay entry.
If you must sever larger roots, consult an arborist to preserve Tree stability. Trim or remove conflicting trees rather than repeatedly shaving roots.
Repair hardscape to restore a flush walking surface and maintain required clearances at weep screeds and siding.
Extend downspouts, add splash blocks, and keep swales clear so runoff discharges away without ponding.
Regrade Soil For Drainage
Even though your gutters and downspouts work properly, poor surface grading can still drive water toward the foundation and saturate soils at the perimeter.
Regrade to shed runoff away from walls and slabs, targeting a minimum 5% slope (about 150 mm over 3 m) for the first 3 m where feasible.
Keep finished grade at least 150 mm below siding and weep screeds, and don’t bury brick veneer weep holes.
Use compacted, low-permeability fill in lifts to limit settlement; add topsoil only as a cap for planting as part of soil improvement.
Confirm you maintain positive drainage at swales and walkways, and tie regrading into drainage solutions like splash blocks or extensions.
Frequently Asked Questions
How Often Should I Repaint Exterior Trim in Harsh Climates?
In harsh climates, you’ll repaint exterior trim every 3–7 years, depending on exposure and coating spec. Prioritize Surface preparation per manufacturer standards, and make Color selection for UV stability to reduce premature chalking.
Are Pressure Washers Safe for Older Brick or Stucco Exteriors?
Yes, but only if you don’t cosplay as a demolition crew. For Brick cleaning, use 500–1200 psi, 25° tip, 12–18 in. standoff. For Stucco care, use <1500 psi, avoid edges. Test first.
What Exterior Maintenance Tasks Require Permits or HOA Approval?
You’ll need Permit requirements and HOA approval for structural changes, reroofing, window/door replacements, exterior repainting, fences, decks, sheds, solar, HVAC units, retaining walls, driveway work, and tree removal. Verify local code, setbacks, and design standards.
How Can I Deter Pests From Nesting in Exterior Walls and Eaves?
Want pests out fast? You’ll block entry points, install 1/4-inch galvanized mesh at vents, seal gaps with exterior-rated sealant, trim overhang contact, and maintain dry insulation. Pest prevention depends on nesting deterrents and regular inspections.
When Should I Hire a Professional Instead of Doing Exterior Maintenance Myself?
You should hire a professional when tasks involve heights, electrical, structural, or pest hazards, exceed DIY safety limits, or require code compliance. If budget considerations favor warranties, specialized tools, or faster completion, don’t DIY.
Conclusion
Stay on a season-by-season checklist so you catch failures before they cascade. After storms, you’ll verify roof coverings, flashing laps, and fasteners meet manufacturer specs. You’ll clear gutters, extend downspouts, and confirm discharge routes away from the foundation. You’ll seal cracks and replace failed caulk to maintain a continuous water-control layer. You’ll wash siding, windows, and decks to limit mold and rot. Trim vegetation and correct grading—small steps act like an insurance policy.