You probably don’t know most shed damage starts at the drip line, not the roof. You’ll keep problems small if you run a 10‑minute weekly check for soft spots, pest trails, loose fasteners, and door gaps. Clear gutters, regrade soil, and add gravel where water lands to stop pooling. Ventilate to control humidity, then seal seams with caulk and weatherstripping. Next, you’ll want a simple seasonal routine that prevents the costly failures you can’t see yet.
Do a 10-Minute Garden Shed Inspection Checklist

Before you put tools away for the week, run a 10-minute shed inspection that catches small failures early and prevents moisture, pests, and structural wear from compounding.
Start at the threshold: confirm the door seals, hinges, and latch align, and that daylight doesn’t show around jambs. Scan walls and floor for damp spots, peeling paint, soft wood, or rust on fasteners. Check vents and screens for blockage and gaps that invite rodents or insects.
Verify shelves are level, brackets are tight, and heavy items sit low for safer Garden shed organization. Then apply tool storage techniques: wipe metal tools dry, oil pivots, hang long handles, and bin small parts with labels.
Finish by sweeping debris and resetting desiccant packs.
Keep the Garden Shed Roof Leak-Free (Shingles, Flashing)
Check your shingles on a set schedule and replace any that are cracked, curled, or missing before water gets under the courses.
Inspect all flashing at seams, edges, and penetrations, then reseal gaps with compatible roofing sealant and refasten any loose sections.
Keep the roof surface clear of leaves, moss, and branches so water sheds fast and doesn’t back up under shingles or along flashing.
Inspect Shingles Regularly
Even if your shed roof looks intact from the ground, shingles can loosen, curl, or crack in ways that funnel water under the roof covering. Get on a stable ladder and scan each slope in good light, looking for lifted tabs, missing granules, exposed nail heads, and soft spots along edges and ridges.
Press gently to confirm adhesion and mark defects for prompt replacement. Track shingle durability by noting brittleness, cupping, and granule loss after storms or high heat.
Check that roof ventilation isn’t blocked, because trapped heat accelerates shingle aging and warps courses. Clear debris, trim overhanging branches, and re-check after heavy wind, hail, or freeze-thaw cycles.
Document findings seasonally so you catch trends before leaks start.
Seal And Maintain Flashing
Shingles shed most of the water, but flashing handles the risky joints where leaks usually start—along roof-to-wall lines, around vents, and at ridges and edges.
Check every run for lifted edges, pinholes, corrosion, and fasteners backing out. Reseat loose sections and replace deformed pieces; don’t bend metal back repeatedly.
Clean the seam line, then apply a compatible polyurethane or butyl roof sealant in a continuous bead, tooling it tight against both surfaces. Refasten with gasketed screws, not nails, and cap exposed heads with sealant.
Confirm counterflashing overlaps step flashing shingle-style to shed water. Tight flashing reduces rot that can compromise garden shed security and protects stored items that support tool organization.
Recheck after heavy wind.
Clear Debris From Roof
Because wind and falling branches dump organic debris where water should shed cleanly, keep the shed roof clear to prevent moisture from backing up under shingles and flashing. Schedule roof cleaning every month in fall and after high winds. Use a stable ladder, soft-bristle broom, and gloved hands; don’t use pressure washers that can lift tabs and strip granules.
Work from the ridge down, sweeping toward the eaves so you don’t force debris under courses. Clear valleys, drip edges, and around vents where water concentrates. During storm preparations, remove moss mats and leaf piles, then confirm runoff paths are open.
Finish by inspecting shingle edges and flashing seams for trapped needles, then rinse lightly with a hose to verify flow.
Seal Garden Shed Doors and Windows Against Drafts
When cold air and moisture slip through unsealed gaps, they accelerate rust, rot, and tool corrosion inside your shed. Start by inspecting door edges, window frames, and threshold contact points with a flashlight; mark any light leaks.
Clean surfaces, then apply exterior-grade silicone or polyurethane caulk to static joints. For moving seams, install compressible EPDM weatherstripping and a door sweep that seals against the sill without dragging.
Add Weatherproofing insulation by fitting rigid foam to inset panels, keeping clear of hinges and latches.
Tighten or shim hinges so the door sits square and closes evenly.
Finish with Security enhancements: replace worn strike plates, add longer screws into studs, and ensure seals don’t prevent full lock engagement. Recheck fit seasonally.
Control Garden Shed Moisture: Ventilation and Drainage
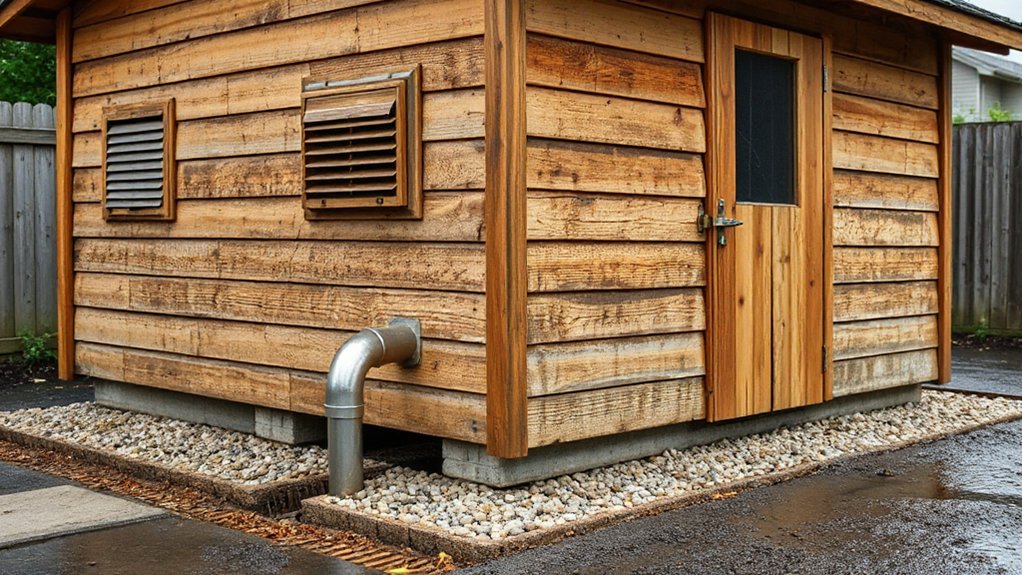
Sealing drafts keeps outside air from sneaking in, but you’ll still need to manage the moisture you trap inside the shed. Start by verifying airflow: install opposing vents high on one wall and low on the other, and keep louvers unobstructed. If you’ve got power, add a small exhaust fan on a humidistat to maintain consistent air exchange.
Next, control ground and surface water. Grade soil so runoff slopes away, and extend downspouts past the shed footprint. Inside, elevate stored items on pallets and install moisture barriers under mats or along bare concrete to limit vapor drive.
For active drying, optimize dehumidifier placement near the center, away from walls, with a clear condensate drain path.
Pest-Proof Your Garden Shed (Gaps, Food, Nesting)
Even if you’ve tightened up drafts and managed humidity, pests will exploit tiny gaps and any available food or nesting material. Start with a perimeter inspection: probe corners, sill joints, and door thresholds. Seal cracks with exterior-grade caulk; cover larger voids with copper mesh or galvanized hardware cloth, then cap with sealant. Add a door sweep and ensure vents are screened to create reliable insect barriers.
For Rodent prevention, store seed, fertilizer, and pet food in lidded metal or thick plastic bins; don’t leave birdseed or fallen fruit nearby. Keep cardboard, cloth, and insulation scraps off the floor, and rack lumber to remove nesting zones.
Set snap traps in locked bait stations along walls, and check them weekly.
Prevent Shed Rust, Wood Rot, and Peeling Paint
Although pests get most of the attention, moisture and UV exposure will quietly corrode metal hardware, feed fungal decay in framing, and lift paint films until they peel.
Start by controlling water: keep roof fasteners tight, seal penetrations with exterior-grade sealant, and maintain positive drainage so splashback can’t wick into siding.
For Rust prevention, wire-brush oxidation to bare metal, wipe clean, then apply a zinc-rich primer and a topcoat; use stainless or hot-dip galvanized replacements where possible.
For wood preservation, treat end grain and cut edges with borate solution, then prime and paint or stain with a UV-resistant finish.
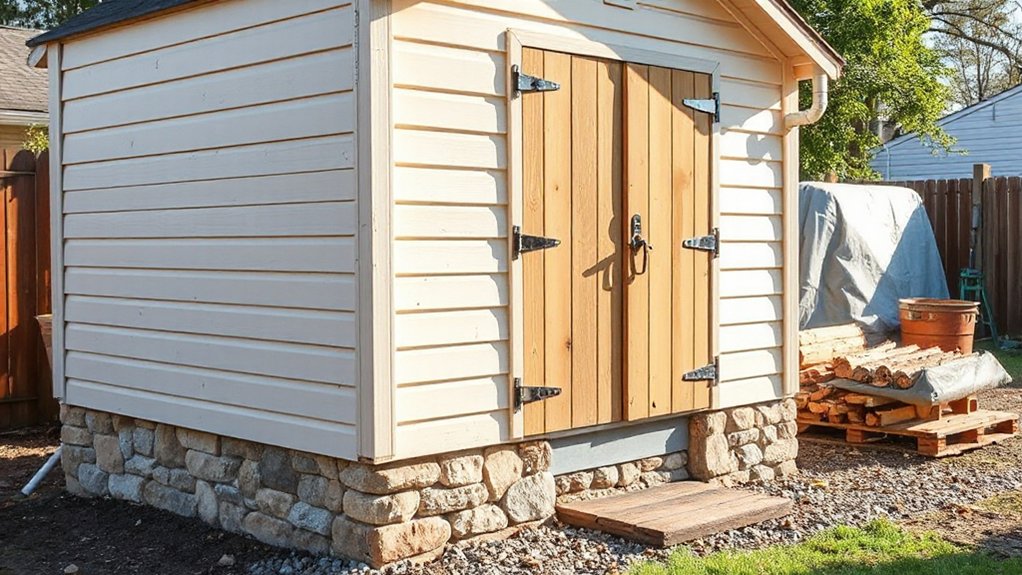
Maintain a small clearance between soil and wood, and use capillary breaks under skids to block rising damp.
Seasonal Garden Shed Maintenance Checklist (Spring–Winter)
Use a seasonal checklist so you catch small shed issues before they become structural repairs.
In spring and summer, you’ll inspect the roof, siding, and base for moisture intrusion, verify ventilation, and touch up sealants and coatings on a set schedule.
In fall and winter, you’ll clear gutters and drainage paths, weatherstrip doors, protect hardware from corrosion, and secure the shed for snow load and freeze–thaw cycles.
Spring And Summer Upkeep
As temperatures rise and humidity swings, spring and summer become the best time to reset your shed’s defenses before heat, UV exposure, and sudden storms do damage. Start with a roof and flashing check; reseal fasteners and replace curled shingles. Inspect siding and trim for soft spots, then spot-prime and repaint to block UV. Clear gutters and grade soil so runoff doesn’t pool at the threshold.
Next, tune ventilation: clean vents, add a louver if condensation persists, and run a small desiccant tub near metal tools. Tighten hinges, lubricate locks, and verify the door swe
Fall And Winter Prep
Late-season warmth gives you a short window to prep the shed for freeze–thaw cycles, wind-driven rain, and snow load. Start by clearing gutters and downspouts, then check flashing, caulk gaps, and replace cracked weatherstripping to stop capillary leaks.
Inspect the roof deck from inside; dark stains signal fastener or shingle failures you should seal now. Regrade soil away from the slab and add gravel at drip lines to reduce splashback.
Next, handle garden shed organization: purge damp cardboard, label bins, and move fertilizers, paints, and fuel to temperature-safe storage.
For tool storage, clean metal, oil hinges and blades, and hang tools off the floor to prevent rust and wicking.
Finally, add a moisture absorber, verify vent screens, and set traps before rodents move in.
Frequently Asked Questions
How Do I Choose the Best Location for a New Garden Shed?
Choose a level, well‑drained spot with access and clearances, avoiding roots and utilities. Orient for sun and runoff. Match Garden shed materials to microclimate. Plan Landscaping integration to maintain sightlines, drainage paths, and stability.
Do I Need a Permit to Build or Replace My Garden Shed?
You might need a permit, depending on shed size, height, use, and utilities. Verify local building codes and zoning regulations, then document setbacks, easements, and foundation type. Don’t start work until approvals and inspections.
What’s the Best Way to Organize Tools and Maximize Shed Storage Space?
You’ll maximize shed space by zoning tools, using vertical Tool organization, and choosing modular Storage solutions: wall panels, pegboards, shelves, and labeled bins. You’ll track inventory, standardize container sizes, and keep heavy items low.
How Can I Add Electricity and Lighting to My Shed Safely?
You’ll run a buried conduit… then pull Electrical wiring to a subpanel, bond/ground it, and install GFCI breakers. Use damp‑rated fixtures, sealed boxes, proper gauge, and permits; test circuits, label loads, and prioritize lighting safety.
Which Shed Foundation Type Is Best for My Soil and Climate?
You’ll pick the best shed foundation after soil assessment: use concrete piers for expansive clay, gravel pad for well-drained sand, slab for freeze-thaw zones. You’ll add drainage, vapor barrier, and frost-depth footings to prevent heave.
Conclusion
Treat your shed like a small ship: if you don’t check the hull, water finds its way in. Run your 10‑minute inspection, then keep the roof tight with sound shingles and flashing. Seal doors and windows, and manage moisture with vents, drainage, and clear gutters. Block pests by closing gaps and removing food and nesting bait. Stop rust, rot, and peeling paint with timely touchups. Follow seasonal checklists, and you’ll stay ahead.