Table of Contents
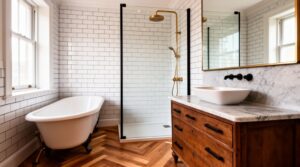
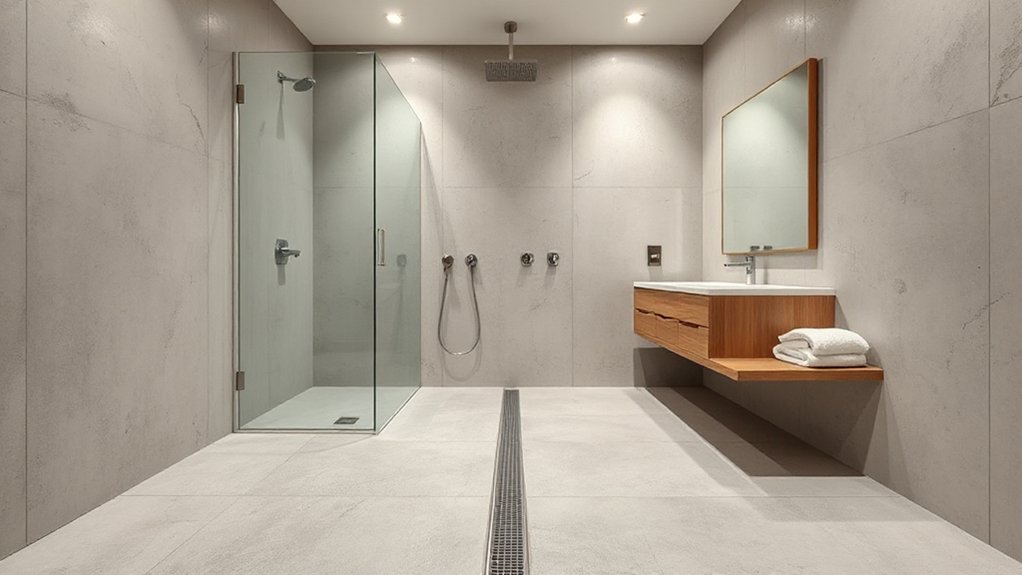
Nearly 70% of homeowners say they’d pay more for a bathroom that feels like a hotel. You can get that calm, minimal, hotel-inspired wet room look by zoning the room into a dry area and a controlled splash zone, then committing to seamless surfaces—large-format, slip-rated porcelain, a discreet linear drain, and frameless glass that doesn’t chop up the sightlines. But if you get the slope, waterproofing, or fixture placement wrong, the whole scheme falls apart—so start with one decision that sets everything else.
Is a Wet Room Right for Your Bathroom?
If you’re weighing a wet room, start by checking whether your bathroom can handle a true “all-over” water zone without compromising layout or finishes. You’ll need continuous waterproofing at floor and lower walls, a correctly sloped substrate, and a drain location that won’t force awkward tile cuts.
Confirm joist depth, plumbing access, and whether you can recess the floor or use a low-profile former to keep thresholds minimal.
Choose materials that like water: porcelain with high slip resistance, epoxy grout, and sealed stone only if you’ll maintain it. Your bathroom decor should stay spare—wall-hung vanity, moisture-rated paint, and corrosion-resistant hardware.
Prioritize ventilation solutions: a quiet, high-CFM fan, timed run-on, and a heated towel rail to reduce lingering humidity.
Plan a Wet Room Layout (Dry Zone vs Splash Zone)
Start by drawing clear dry-zone boundaries where towels, wood vanities, outlets, and paper goods stay protected behind a screen or outside the drain fall line.
Then map the splash zone by tracing the shower head’s spray arc, body movement, and door swing, and assign fully waterproof finishes—sheet membrane, tiled walls, and a slip-rated floor—within that footprint.
When you separate these zones on plan, you’ll place the drain, glass, and storage with fewer compromises and longer-lasting materials.
Define Dry Zone Boundaries
Once you’ve fixed the shower position and drain line, define the dry zone boundaries by tracing where water will realistically travel—spray arc, splash radius, and foot-traffic drip line—then set a hard visual edge for finishes and slopes.
Use boundary marking that you can build to: a grout-line datum, a tile module break, or a linear inlay strip.
Keep the Dry zone on a single, flatter plane with minimal fall, and shift the wet area to a steeper, directed slope toward the drain.
Reinforce the edge with material cues: matte porcelain outside, higher-grip mosaic or textured tile inside.
Align thresholds with door swings, vanity toe-kicks, and towel reach so you don’t trap puddles under cabinetry.
Detail a clean, straight joint for sealant and waterproofing continuity.
Map Splash Zone Reach
Because spray doesn’t stop at the glass line, map the splash zone in plan by plotting the showerhead’s arc, the body-spray rebound off walls, and the drip path from the exit point to the towel hook. Treat that outline as your wet-spec field: full-height waterproofing, non-slip tile, sealed grout, and a drain plane that captures runoff before it crosses into the dry zone.
Map splash zone reach with real dimensions: 36–48 inches from the spray source, plus corners where turbulence pushes water. Keep electrical, millwork toes, and paper storage outside that band.
Place a squeegee, robe hook, and towel within arm’s reach but beyond direct spray for reach safety. If you’re tight on space, swap a fixed head for a rain arm with tighter throw and add a low curb or linear drain.
Choose Tray vs Tanked Floor (Pros/Cons)

Once you’ve set your dry and splash zones, you’ll need to choose between a preformed shower tray or a fully tanked, sloped floor, because each option locks in your floor build-up and drain position.
A tray typically installs faster with fewer waterproofing interfaces, while a tanked floor demands precise falls, careful membrane detailing at corners and penetrations, and strict cure times for long-term reliability.
Your decision also shifts the budget and upkeep: trays can cost more upfront but simplify repairs, whereas tanking may save on materials yet raises labour, inspection, and future leak‑tracking complexity.
Installation Complexity
How complex your wet room install feels often comes down to one decision: a pre‑formed shower tray or a fully tanked, built‑up floor. A tray gives you a fixed fall and drain position, so you can set levels fast and plan tile cuts around a defined footprint. Your main installation challenges are aligning waste runs, keeping thresholds flush, and boxing services without stealing floor area.
A tanked, built‑up floor lets you tune the shower zone size and run large-format tiles through for a seamless look, but it raises structural considerations. You’ll need more precise screed depths, tighter tolerances at door lines, and careful coordination of underfloor heating, insulation boards, and drain height.
Expect more drying time and more trade sequencing across the room.
Waterproofing Reliability
Where do wet rooms actually fail—at the joints, around the drain, and at any change in level? If you want reliable waterproofing, decide whether you’ll control those shifts with a pre‑formed tray or a fully tanked floor.
A tray gives you a single, factory‑sloped plane with predictable falls and a matched drain interface, reducing risk at corners and perimeter upstands. You still need meticulous sealing at tray-to-wall junctions and any board penetrations, but the critical slope is fixed.
A tanked floor lets you shape the whole room, ideal for awkward footprints and flush thresholds, yet you’re creating every seam: membrane overlaps, internal corners, and drain collars. Use proven Waterproofing techniques—reinforcing tape, compatible primers, and continuous coverage—and prioritise Material durability in boards, membranes, and bonding compounds.
Cost And Maintenance
Although both routes can hit the same finished look, the tray-versus-tanked decision usually shows up in your budget lines and your cleaning routine. A preformed tray costs more upfront, but you buy speed: predictable falls, fewer labour hours, and less tile cutting around the drain. In tight footprints, it also simplifies layout because the slope is locked in.
A tanked, screeded floor can be cheaper in materials and lets you push the drain exactly where your glass and vanity alignment demand, yet it often adds labour and drying time.
For upkeep, trays give you consistent grout lines and fewer low spots that hold water. With tanked floors, you’ll want Maintenance tips: squeegee daily, seal grout, and inspect corners.
Cost efficient upgrades include epoxy grout, linear drain, and removable hair trap.
Set Wet Room Floor Slope (1:80–1:50 Guide)
Before you lock in waterproofing layers or tile layout, set the wet room floor to a controlled slope toward the drain—typically between 1:80 and 1:50—so water clears quickly without creating a noticeable “ramp” underfoot.
Start with slope calculation: measure the run from the farthest corner to the drain point, then divide by 80–50 to get required drop (e.g., 1600 mm run needs 20–32 mm fall).
Keep gradients outside the wet zone as level as possible, and use a pre‑formed gradient board or screed guide rails for repeatable accuracy.
Check Floor drainage with a long level and straightedge in multiple directions, ensuring no backfalls at door lines or under benches.
Dry‑lay tiles to confirm cuts still align with the slope.
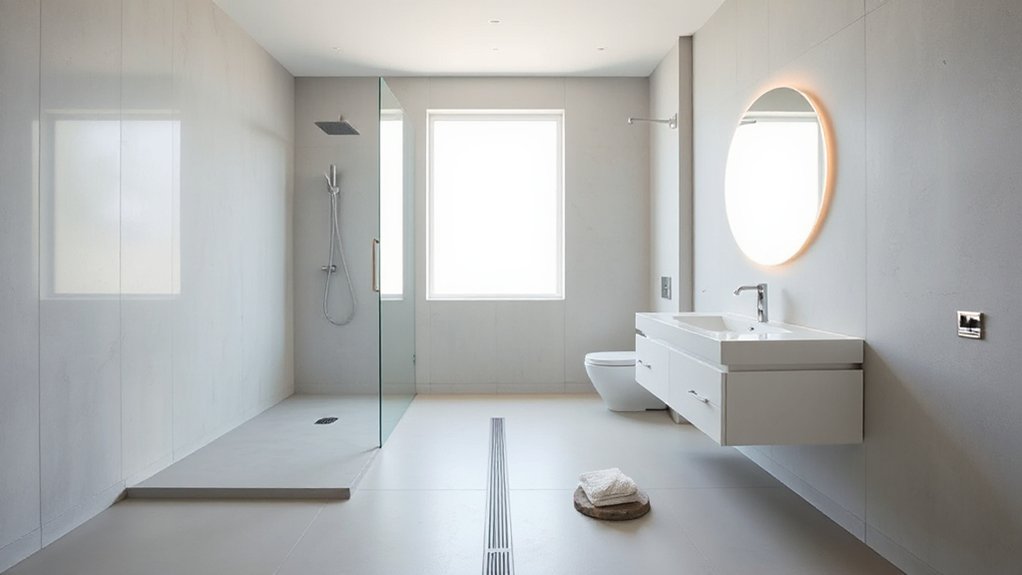
Choose the Best Wet Room Drain (Linear vs Point)
How you place the drain will dictate the floor geometry, tile module, and even the waterproofing shifts, so choose it as a space‑planning decision—not an afterthought.
A linear drain along the back wall or threshold lets you run a single-plane fall, so large-format porcelain reads calm and grout lines stay minimal. It also suits a frameless screen because you can align the channel with the glass edge and keep the entry dry.
A point drain centers best in compact rooms, but it forces four-way falls, so tile patterns need smaller modules (mosaics or 50–100 mm pieces) to follow the pitch cleanly.
Compare drain options by grate finish, clean-out access, and outlet location, then set the drain before you lock tile patterns and cuts.
Waterproofing a Wet Room: Layers, Corners, Test
Once you’ve set the drain, you’ll build a waterproofing layer stack that ties the sloped substrate to the drain flange without breaks.
You’ll reinforce corners and treat every seam and fastener line with compatible banding and preformed pieces so movement can’t open a path.
Then you’ll plug the drain and run a flood test for the required hold time to confirm the pan stays tight before tile goes down.
Waterproofing Layer Stack
Even if your wet room layout looks simple on paper, the waterproofing layer stack needs a precise, continuous build-up from subfloor to finished surface. Start by flattening and cleaning the substrate, then prime for predictable layer adhesion and to control suction.
Set the slope with a bonded mortar bed or a pre‑sloped foam tray, keeping drain height and tile thickness aligned so your finished plane stays flush at the doorway.
Apply your chosen waterproofing materials—sheet membrane or liquid-applied system—according to coverage rates and cure times, and integrate them with the drain’s bonding flange for a single watertight field.
Add a compatible thinset layer, then set porcelain or stone with tight grout joints.
Finish with a stain-resistant grout and a flexible sealant line at all movement transitions.
Corners, Seams, Flood Test
Because most wet-room leaks start where planes change, you need to treat corners, seams, and penetrations as a reinforced system—not leftover details.
Run preformed corner pieces or fabric tape at every wall-to-floor and wall-to-wall junction, then overlap seams by the manufacturer’s spec so water can’t wick behind tile.
Wrap the drain flange and pipe penetrations with compatible gaskets, and keep fasteners out of the wet zone.
Plan tile layout so grout lines don’t land on movement joints; leave a clean perimeter gap and seal it with color-matched silicone.
Before setting tile, plug the drain and flood test to code depth for 24 hours, marking the waterline. Fix drops immediately.
Afterward, confirm bathroom ventilation so drying matches your minimal palette and personalized decor.
Choose Slip-Resistant Wet Room Tiles (R Ratings)
While you’re laying out a wet room, treat tile slip resistance as a spec—right alongside falls, floor build-up, and drainage—rather than a last-minute finish choice. Use R ratings to match risk zones: go higher under the shower path and turning area, slightly lower in drier circulation.
Prioritise textured porcelain or small-format mosaics; more grout lines add grip and help you hold a consistent slope to the drain without lipping. Keep the palette quiet, then use Decorative accents sparingly as a border or niche back panel so you don’t compromise traction on the main walking line.
Pair tile choice with ventilation solutions, since faster drying reduces film and soap scum. Confirm the rating with the supplier, not just a showroom sample.
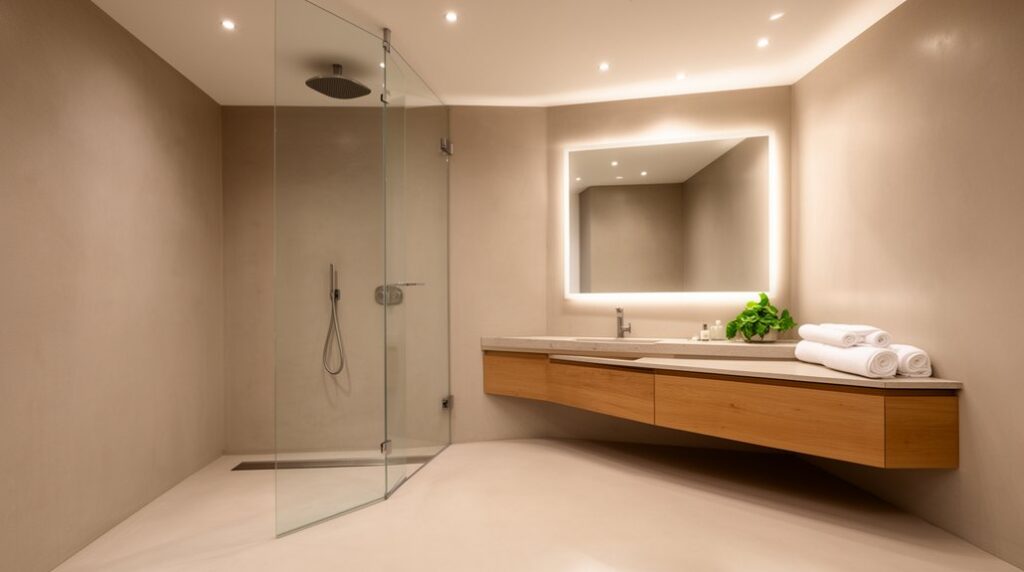
Keep the Wet Room Minimal With Frameless Glass
If you want the wet room to read as one clean volume, specify frameless glass and let the floor plane, wall tile, and drain line stay visually continuous. You’ll avoid visual breaks that chop up the footprint, so the room feels larger and more hotel-like.
Use 10–12 mm tempered panels with polished edges, set on minimal U-channels or discreet clamps. Keep silicone joints tight and color-matched to grout so the enclosure disappears.
Align the glass with tile module lines and terminate it on a full tile to prevent awkward slivers. Choose a doorless return panel where code and splash allow, or hinge a single leaf with concealed hardware.
Specify low-iron glass for truer color and fewer green edges. Frameless glass reinforces Minimal aesthetics without sacrificing water control.
Wet Room Space-Savers: Wall-Mounted Fixtures + Valves
Frameless glass keeps the sightlines clean; wall-mounted fixtures keep the floor and corners just as open. Choose a wall-hung WC with an in-wall carrier to shorten the visual footprint and simplify clearances around the drain plane.
Pair a floating vanity or compact wall basin with a concealed trap to prevent cluttered underlines.
For the shower, run a recessed mixing valve and diverter in the stud bay, then keep only a slim control plate outside. You’ll gain elbow room and reduce snag points.
Specify a thermostatic valve for steady temperature and a pressure-balance backup if codes require it.
A handshower on a wall outlet plus an overhead rain head reads like Luxury amenities without extra bulk. These design trends also make cleaning and circulation easier.
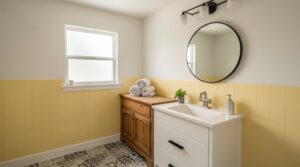
Storage, Lighting, and Finishes for a Hotel-Clean Look
Because a wet room leaves nowhere to hide clutter, you’ll get the most hotel-clean look by planning storage, lighting, and finishes as a single system. Build recessed niches between studs for bottles, then add a shallow mirrored cabinet outside the spray zone for daily items.
Keep counters clear with a wall rail and a slim towel shelf that drains. Layer lighting: a damp-rated ceiling downlight for even fill, vertical sconces at eye level for grooming, and a low-glare LED strip in the niche.
Choose large-format porcelain with matching grout, then run it wall-to-floor to erase junctions. Specify matte, fingerprint-resistant paint on dry walls.
Coordinate Plumbing fixtures in one finish, and pair strong Bathroom ventilation with a quiet timer to prevent haze and spotting.
Frequently Asked Questions
Do Wet Rooms Reduce Home Resale Value or Appeal to Buyers?
Wet rooms usually don’t reduce resale value; you’ll often boost appeal if you execute them well. You’ll add Luxury features and Design flexibility with proper waterproofing, linear drains, non-slip porcelain, glass screens, and precise slope detailing.
What Is the Typical Total Cost to Build a Wet Room?
You’ll typically spend $10,000–$25,000 total; waterproofing alone can run 20% of your budget. You’ll balance Budget considerations with Design flexibility by choosing large-format tile, linear drains, glass screens, and membrane systems.
How Long Does a Wet Room Installation Usually Take?
You’ll usually need 7–14 days, depending on layout complexity. You’ll spend time on demolition, sloped screed, waterproofing techniques, tile curing, and testing. Don’t rush wet room ventilation, linear drain alignment, or grout sealing.
Are Wet Rooms Harder to Clean Than Standard Showers?
Wet rooms aren’t harder to clean if you plan drainage and surfaces well. You’ll face Cleaning challenges at grout lines and fixtures, but large-format tile, seamless waterproofing, and good slope reduce residue and maintenance considerations.
Do I Need Planning Permission or Building Control Approval for a Wet Room?
You usually won’t need planning permission, but you’ll likely need Building Control sign‑off under Building regulations. You must meet waterproofing standards for tanking, falls, drains, and ventilation. Check listed buildings or structural changes.
Conclusion
If you want a minimal, hotel‑inspired wet room, plan it like a clean blueprint: define your dry zone and splash zone, then lock in waterproofing, a 1:80–1:50 fall, and a discreet linear or point drain. Choose large‑format, slip‑resistant porcelain (check R ratings), keep grout lines tight, and add frameless glass to preserve sightlines. Wall‑mounted fixtures, concealed valves, and recessed niches cut visual noise. Layer lighting and calm finishes for a polished, spa‑quiet result.