We’re looking at Minimalist Home Gym Setup options and designs.You probably don’t know that the biggest driver of home-workout consistency is friction—how many steps it takes to start—not motivation. If you set clear goals, map your floor space, and choose a few versatile tools, you’ll train more often and with fewer injury risks. Keep sightlines clean, store gear fast, and use durable flooring and neutral light to reduce distractions. The question is which essentials earn their spot in your square footage…
Choose Goals: Strength, Cardio, Mobility
Before you buy any equipment, decide what you want your home gym to do for you—build strength, improve cardio fitness, increase mobility, or some combination—because your goal should drive every setup choice.
For strength, prioritize progressive overload and joint-friendly patterns: squat, hinge, push, pull, carry. Keep loads manageable, use controlled tempo, and stop sets shy of form breakdown to reduce injury risk.
For cardio, aim for at least 150 minutes weekly of moderate effort or 75 vigorous, using intervals if you’re time-crunched; track heart rate or talk test for intensity.
For mobility, target hips, ankles, thoracic spine, and shoulders with short daily sessions and end-range control.
Build workout routines around your personal motivation: specific outcomes, milestones, and adherence.
Measure Your Space and Map the Layout
Although it’s tempting to buy equipment first, you’ll get a safer, more efficient home gym by measuring your available floor area, ceiling height, and clearances around doors, windows, vents, and walkways, then sketching a simple layout that matches your training goals.
Use a tape measure and note maximum reach zones for overhead presses, swings, or jumps, plus safe fall space around you. Mark out a “training rectangle” with painter’s tape so you can test movement paths before you commit.
Prioritize space optimization by keeping entry routes unobstructed and leaving room to load, unload, and step away from weights.
In your layout planning, place higher-impact or sweaty work near ventilation, and keep breakables away from dynamic movements.
Recheck measurements after adding mats or flooring thickness.
Minimalist Home Gym Essentials (By Goal)
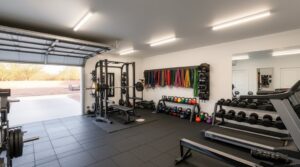
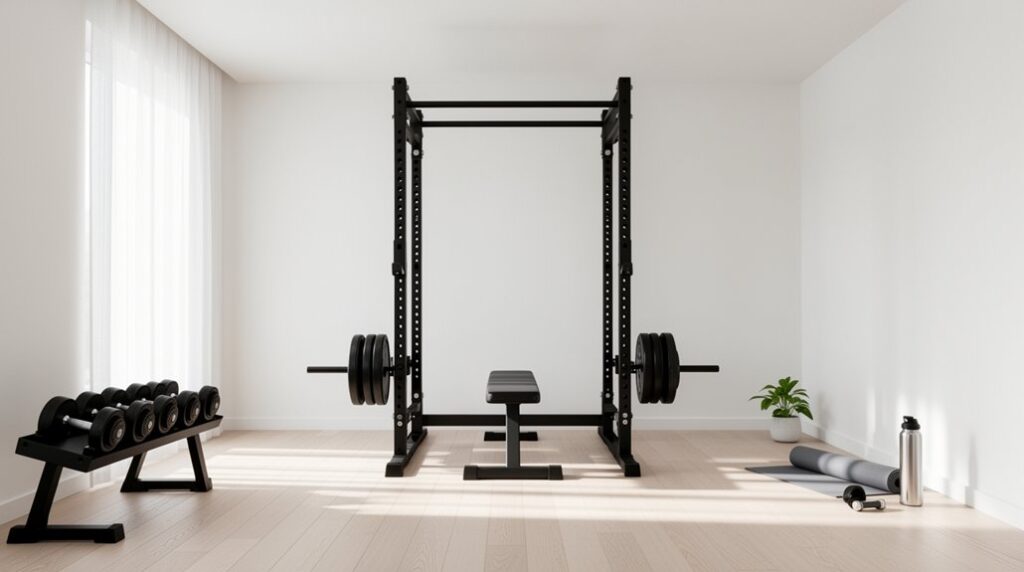
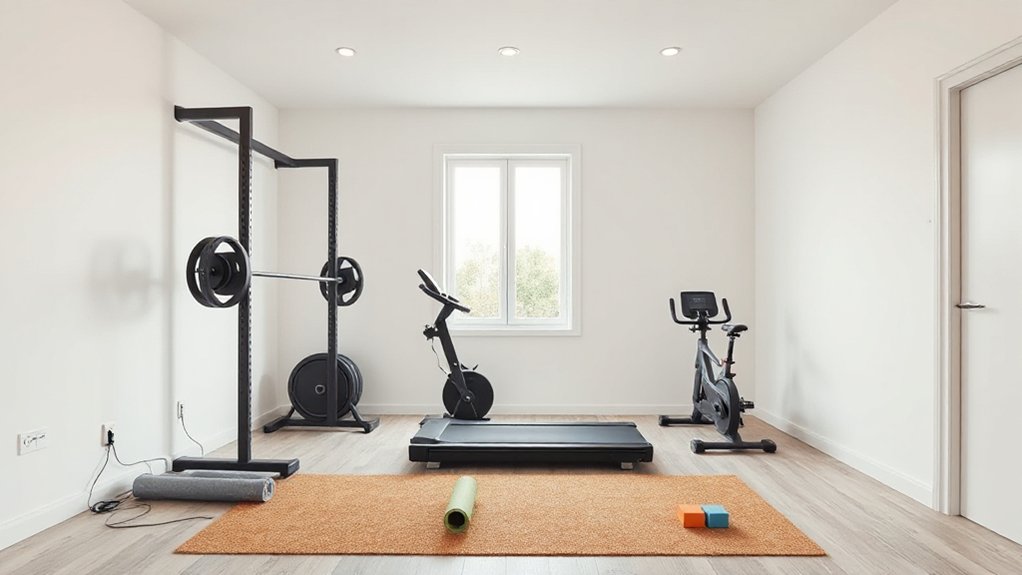
With your training rectangle mapped and clearances confirmed, you can now choose a minimalist equipment list that matches what you want to improve—strength, conditioning, mobility, or general fitness—without overcrowding the room or creating trip hazards.
For strength, start with adjustable dumbbells and a stable bench rated for your bodyweight plus load. Keep collars and floor protection to reduce slips.
For conditioning, prioritize a compact cardio piece you’ll actually use (jump rope or air bike) and set a timer for intervals to control intensity.
For mobility, use a firm mat and a foam roller. Aim for controlled ranges, not pain.
For general fitness, combine a mat, timer, and dumbbells for full-body circuits.
Use Color coordination to simplify choices, and add motivational decor that doesn’t block exits.
Add Versatile Tools Without Adding Clutter
To expand your home gym without crowding it, you’ll get more training stimulus per square foot by choosing multi-use, compact tools like adjustable dumbbells, resistance bands, and a suspension trainer.
You’ll also cut trip hazards and improve workout consistency by prioritizing foldable, space-saving accessories—such as a folding bench or stowable mat—that store securely between sessions.
You’ll match each item to your goals and confirm load ratings, locking mechanisms, and stable setup so you can progress safely without adding clutter.
Multi-Use Compact Equipment
How do you add more exercise options without turning your home gym into a storage problem? Choose multi use equipment with compact design so each item earns its footprint.
Adjustable dumbbells replace multiple fixed pairs and support progressive overload for strength gains.
Resistance bands cover rows, presses, and mobility work while keeping joint stress manageable when you control tempo.
A weighted vest upgrades walking, squats, and push-ups without changing your setup, but start light and increase load gradually.
Suspension trainers anchor to a doorframe for scalable pulling and core work; check your anchor rating and door integrity first.
Prioritize tools with clear load limits, grippy surfaces, and stable handles, and match purchases to your goals: strength, conditioning, or rehab.
Foldable Space-Saving Accessories
Where can you stash extra training options when every square foot counts? Choose foldable accessories that disappear between sessions yet expand your exercise menu. A collapsible design lets you store push-up handles, ab wheels, step platforms, and portable pull-up bars in a drawer or under a sofa, reducing visual clutter and trip hazards.
Look for lightweight materials that still meet published load ratings, and inspect hinges, locks, and stitching before each use. Prioritize non-slip feet and stable contact points to protect wrists, shoulders, and floors.
Set a goal for each tool—core stability, upper-body volume, or conditioning—and rotate accessories weekly to manage fatigue. When you fold and store everything immediately, you keep consistency high and injury risk low.
Hide Gear Fast With Minimalist Storage
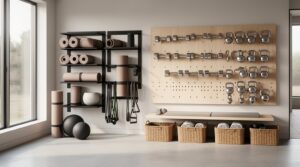
You’ll cut trip hazards and speed up shifts when you can stow gear in seconds, so prioritize storage that keeps floors clear and items secured. Use wall-mounted storage systems to get weights and bands off the ground.
Choose concealed multi-use furniture that locks equipment away between sessions, and add modular bins and shelves so everything has a labeled, repeatable home.
Set it up so your most-used tools sit within arm’s reach while heavier items anchor low and stable for safer handling.
Wall-Mounted Storage Systems
Because clutter increases trip hazards and slows setup, a wall-mounted storage system lets you stash plates, bands, and accessories off the floor in seconds while keeping your training space clear. Anchor racks into studs (or use rated masonry anchors) and follow manufacturer load limits so gear can’t pull free mid-session.
Place the heaviest items at chest height or lower to reduce overhead lifting and shoulder strain, and keep frequently used tools within one-step reach to cut setup time. Use labeled hooks or bins for cables, collars, and chalk to support consistent routines.
For a minimalist look, choose matte rails and align spacing, turning storage into artistic wall displays that read like decorative wall art while staying functional. Inspect fasteners monthly and re-torque as needed.
Concealed Multi-Use Furniture
If you share your training space with a living room or office, concealed multi-use furniture lets you clear the floor fast without sacrificing safety or consistency. Choose a bench that doubles as a storage ottoman, or a coffee table with a lift-top compartment, so your weights and bands stay enclosed, dust-free, and out of walkways.
That reduces trip hazards and protects gear from impact damage that can weaken clips, handles, or coatings over time. Prioritize hidden furniture with smooth, soft-close hinges and secure latches, so fingers don’t get pinched and items don’t spill during quick stow-and-go resets.
Look for multifunctional design rated for sitting loads and stable on hard floors. Keep your most-used tools within one reach to preserve adherence.
Modular Bins And Shelves
When floor space doubles as your training zone, modular bins and open shelving help you reset fast while keeping equipment organized and off walking paths. Choose modular storage sized for your most-used items—bands, collars, straps, jump ropes—so you can finish a session and stow everything in under two minutes.
Label bins by movement category (pull, press, recovery) to reduce decision fatigue and keep workouts consistent. Mount sleek shelving at shoulder height so you don’t lift awkwardly or reach overhead with loaded hands. Keep heavier gear on lower shelves to limit drop risk and protect floors.
Leave a clear “landing zone” for sweaty items to air-dry, cutting odor and slipping hazards. Reassess weekly and retire clutter.
Minimalist Finishes: Flooring, Lighting, Color
To keep your home gym safe, focused, and easy to maintain, treat flooring, lighting, and wall color as performance features—not decoration. Choose rubber or dense foam tiles with enough traction to reduce slips and enough shock absorption to protect joints and subfloor during jumps and drops. Keep seams tight so you don’t catch a toe. Add a stable lifting platform if you train heavy.
For lighting, aim for bright, even, low-glare illumination so you can track form and avoid missteps. Position fixtures to minimize shadows near racks and steps.
On walls, use neutral palettes to lower visual noise and support consistent focus. Matte paint cuts glare and hides scuffs. Finish with contemporary textures—simple, tactile, and non-distracting.
Keep Your Minimalist Gym Setup Low-Maintenance
Although a minimalist gym uses fewer pieces, it still needs a simple upkeep system so sweat, dust, and clutter don’t erode safety or motivation. Build Maintenance routines around friction points: wipe high-touch surfaces after every session, and air-dry mats to prevent odor and microbial buildup.
Keep a small spray bottle of mild detergent or EPA-registered disinfectant, plus microfiber cloths, in a wall caddy so you don’t skip steps.
Set cleaning schedules: weekly vacuum or damp-mop floors to reduce slip risk, and monthly inspect bolts, cables, and bands for wear or cracks.
Re-rack weights immediately and store accessories in one labeled bin to cut trip hazards.
Track it in a checklist; consistency protects progress and extends equipment life.
Frequently Asked Questions
How Can I Soundproof a Minimalist Home Gym for Apartment Living?
Use soundproofing materials like rubber mats, underlayment, and door sweeps, and apply noise reduction techniques: isolate equipment, add wall panels, and schedule quiet hours. You’ll cut impact noise, protect neighbors, and stay lease-compliant.
Do I Need Permits or Landlord Approval to Install Wall-Mounted Equipment?
You usually need landlord approval before Wall mounting, and you may need Equipment permits if you alter structure or electrical. Check your lease, local building rules, and get written consent to reduce liability and improve safety.
What’s the Best Way to Control Humidity and Prevent Equipment Rust?
Sure, let humidity cosplay as a sauna—then you’ll fund rust. Use dehumidifier options to keep 40–60% RH, add ventilation, wipe sweat, oil steel. Rust prevention tips: silica packs, mats, quick inspections.
How Do I Choose Gym Equipment That’s Safe for Kids and Pets?
Choose stable, tip-resistant gear with covered pinch points, no dangling cords, and lockable adjustments. Add Child proofing tips like wall anchoring and storage. Prefer Pet friendly equipment with enclosed flywheels and quiet belts.
What’s a Realistic Budget Range for a Sleek, Minimalist Home Gym Setup?
You should budget $300–$1,200 for a sleek minimalist gym; $600–$900 covers most needs. Use Budget planning to match goals, buy Equipment essentials first, and prioritize certified gear, stable storage, and child/pet-safe layouts.
Conclusion
You set up a sleek minimalist gym to “keep it simple,” then you’ll succeed by measuring, planning, and storing like a pro—so much for effortless. Pick one clear goal, choose versatile tools, and keep floors stable, non-slip, and easy to clean. Use wall racks and concealed bins so gear disappears fast and hazards don’t. Stick to neutral light and matte finishes to cut distraction. Clean weekly, and your space stays safe, focused, and effective.