You can stop most weather damage before it starts by sealing exterior gaps, restoring bare wood, and managing roof and ground drainage. You’ll inspect caulk lines, flashing, siding joints, and small foundation cracks, then choose the right sealant or patch for the material and exposure. You’ll work safely with gloves, eye protection, and stable ladder setup. Start with the highest-risk entry points first, because one overlooked seam can become the next leak.
Seal Exterior Gaps and Joints to Stop Leaks
If you leave exterior gaps and failed joints unsealed, wind-driven rain will force water behind siding, trim, and flashing, where it can rot wood and corrode fasteners.
Inspect caulk lines at window and door casings, corner boards, penetrations, and lap joints; probe for cracks, voids, and adhesion loss.
Choose the right sealant (polyurethane or STPE for movement, high-quality acrylic for paintable trim) and backer rod for deep joints so you don’t create a three-sided bond.
Clean, dry, and tool beads to shed water; don’t seal intended drainage paths.
Use ladders safely and wear gloves and eye protection.
These Weatherproofing techniques also protect Exterior insulation progression by blocking air and bulk-water intrusion.
Scrape, Prime, and Paint Bare Wood Before Rot
Because exposed wood fibers wick moisture fast, you should address peeling paint and bare spots as soon as you find them—before repeated wet/dry cycles open checks, invite fungal growth, and start rot.
Start with Wood preparation: set ladders on stable footing, wear eye protection and a P100 respirator, and wet-scrape to control dust (assume lead on pre-1978 paint). Remove all loose edges, then sand to feather gradients and open pores; vacuum and wipe with a damp cloth.
Treat minor punky areas with a consolidant, but replace soft, crumbly boards.
Move to Surface priming: spot-prime bare wood with an exterior bonding or alkyd primer, sealing end grain. Caulk only after primer cures, then apply two topcoats for a continuous film.
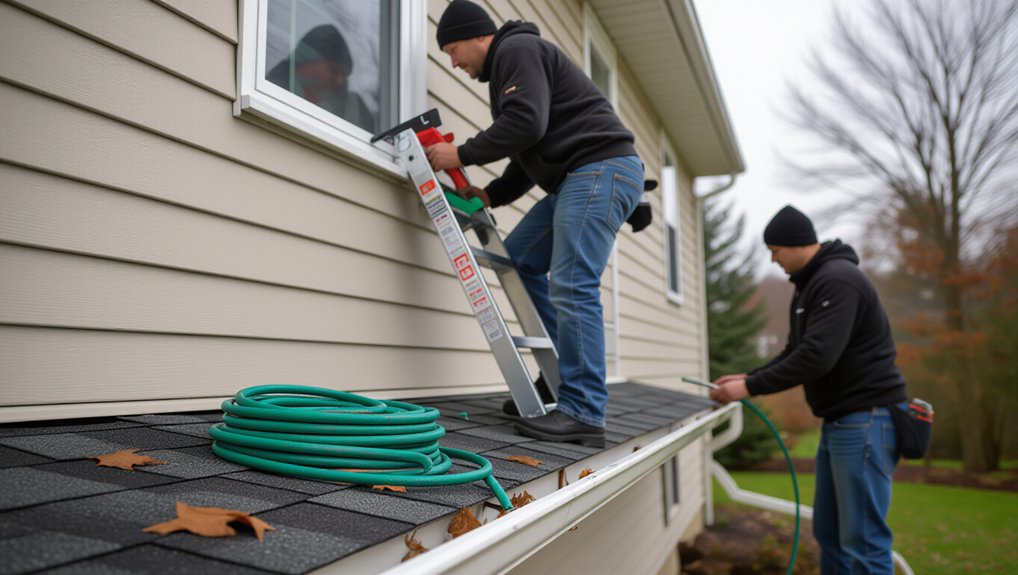
Clean Gutters and Extend Downspouts Away
You can prevent gutter overflow that soaks fascia, siding, and trim by clearing leaves and sediment before storms hit. Work safely on a stable ladder with gloves and eye protection.
Then flush the gutters to confirm free flow.
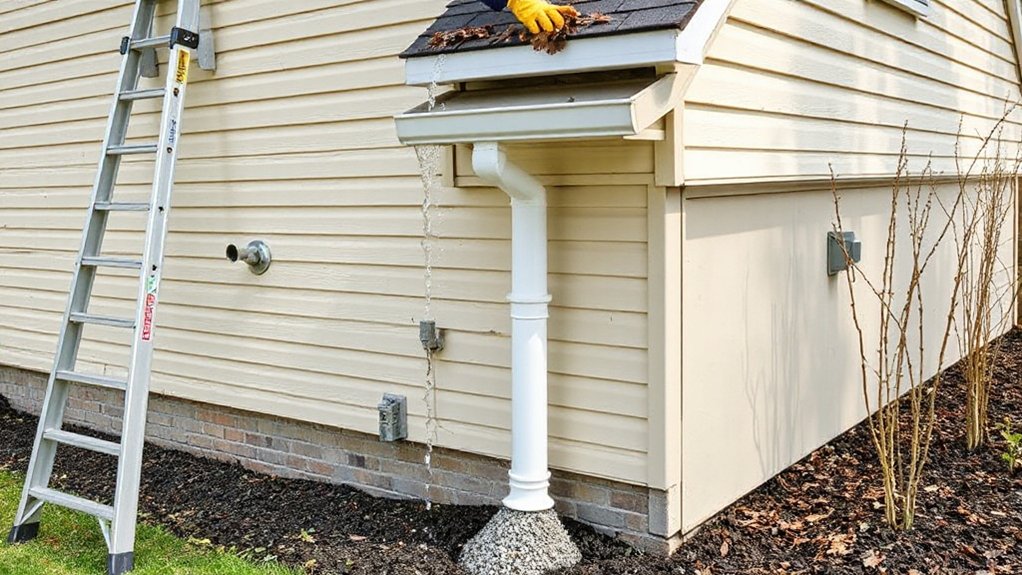
Extend and secure downspouts so runoff discharges several feet away from the foundation, reducing splashback, rot, and erosion hazards.
Prevent Overflow And Rot
When heavy rain hits clogged gutters, runoff spills over the fascia and saturates siding, trim, and the foundation line, accelerating rot and inviting mold. You’ll prevent this by cleaning gutters at least twice a year and after windstorms, removing debris, flushing with a hose, and confirming free flow to each outlet.
Use a stable ladder, wear gloves and eye protection, and avoid working near power lines.
You should also inspect hangers, spikes, and seams; resecure loose sections with Windproof fixtures and reseal joints to stop leaks. Add gutter guards where trees are dense, and verify drip edge alignment so water sheds into the trough.
Repair softened fascia promptly, then prime and paint to restore Rainproof barriers and reduce moisture intrusion.
Direct Runoff Away Safely
A controlled drainage path keeps roof runoff from pooling at the foundation or eroding soil, so start by keeping gutters clear and downspouts functional. Wear gloves and eye protection, use a stable ladder, and scoop debris into a bucket instead of pushing it into the downspout. Flush with a hose to confirm free flow and check for leaking seams or loose hangers.
Extend each downspout 4–6 feet from the house with rigid pipe or a secured splash block, and keep discharge on a positive slope away from slabs and window wells. Add a leaf guard if trees overhang, but still inspect after storms.
For better stormwater management, route water to a rain garden or dry well where codes allow. These drainage solutions reduce ice hazards, siding stains, and basement seepage.
Replace Damaged Exterior Siding and Trim Quickly
Inspect your siding and trim for rot, cracks, and warping, and replace any compromised sections before water intrusion spreads into the sheathing.
Match the original material and profile so panels lock correctly and maintain the wall’s drainage plane.
After fastening, seal seams and exposed edges to block wind-driven rain and reduce future decay.
Spot Rot, Cracks, Warping
Even if your siding looks intact from the street, spot rot, hairline cracks, and warped trim can funnel wind-driven rain behind the cladding and into the sheathing fast.
Probe suspect areas with an awl; soft fibers, dark staining, and musty odor suggest fungal decay. Check joints, butt ends, and around penetrations where caulk fails first.
Act quickly: remove the compromised piece, inspect the WRB and sheathing for moisture, and dry the cavity before closing it up.
Cut back to sound material, prime all cut edges, and re-seal seams with high-quality exterior sealant.
If you see wood warping, correct the cause—often trapped moisture or fastener failure—then reattach with corrosion-resistant fasteners.
Wear eye protection and a respirator when cutting or sanding damaged siding.
Match Materials And Profiles
When you replace exterior siding or trim, match the material, thickness, and profile exactly so the repaired section sheds water the same way and doesn’t telegraph weak seams. Confirm what’s installed—fiber cement, wood, vinyl, aluminum—then buy the same grade and exposure to maintain performance.
Measure thickness with calipers and copy the lap reveal, channel depth, and corner radius for profile consistency. If you switch products, you can create uneven drying, differential movement, and fastener misalignment that invites cracking during freeze-thaw cycles.
Work safely: shut off circuits near exterior lights, use eye protection when cutting, and control silica dust on fiber cement with shears or a HEPA vacuum. Pre-fit pieces dry, align to existing courses, and fasten per manufacturer spacing for Matching materials.
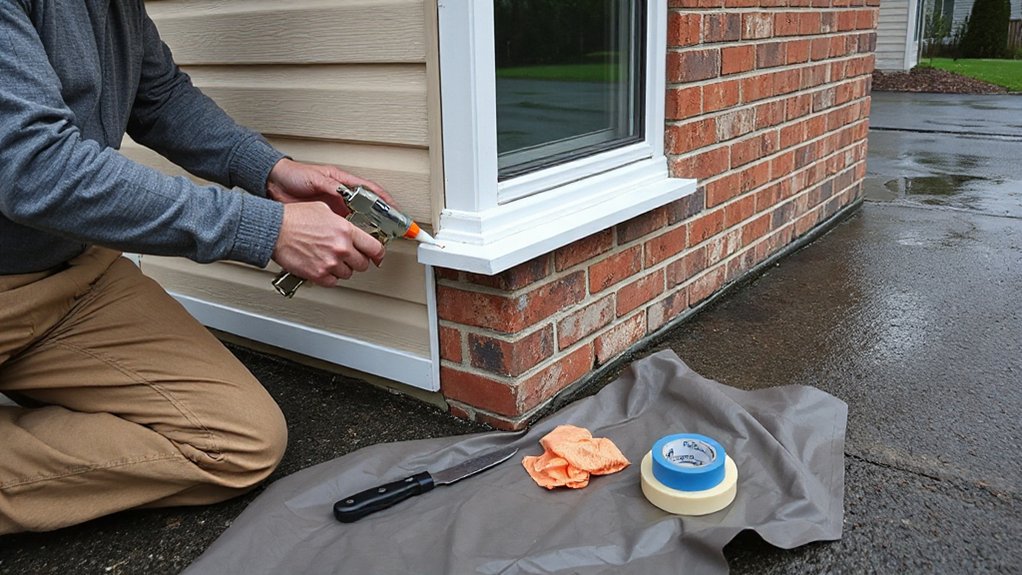
Seal Seams And Edges
A tight seal at seams and edges keeps wind-driven rain from wicking behind your new siding or trim and rotting the sheathing. Before sealing, dry the area, remove loose caulk, and clean dust with a damp rag; wear gloves and eye protection when scraping.
Backer rod fills deep gaps so your sealant bonds on two sides, not three, preventing splits. Use proven caulking techniques: cut the nozzle to match joint width, gun a continuous bead, then tool it smooth to force contact and shed water.
Don’t caulk weep paths or the bottom of lap siding. Prime exposed wood, then apply Weatherproof paint to lock out moisture and UV. Recheck after 24 hours for voids.
Repair Roof Flashing, Fascia, and Soffit Leaks
Because water often sneaks in at roof junctions before you see a ceiling stain, inspect and repair flashing, fascia, and soffit issues as soon as you spot loose metal, cracked sealant, soft wood, or peeling paint.
Work from a stable ladder, wear gloves and eye protection, and avoid wet or windy conditions.
Refasten lifted flashing with corrosion-resistant nails, then seal edges with high-quality polyurethane roof sealant; replace missing step flashing instead of smearing more tar.
Swap rotted fascia or soffit sections, prime cut ends, and fasten with stainless trim screws.
Keep Roof ventilation clear so moisture doesn’t back up under sheathing.
Add gutter guards and clean gutters so overflow doesn’t soak fascia.
Test with a hose after repairs.
Seal Small Foundation and Step Cracks Early
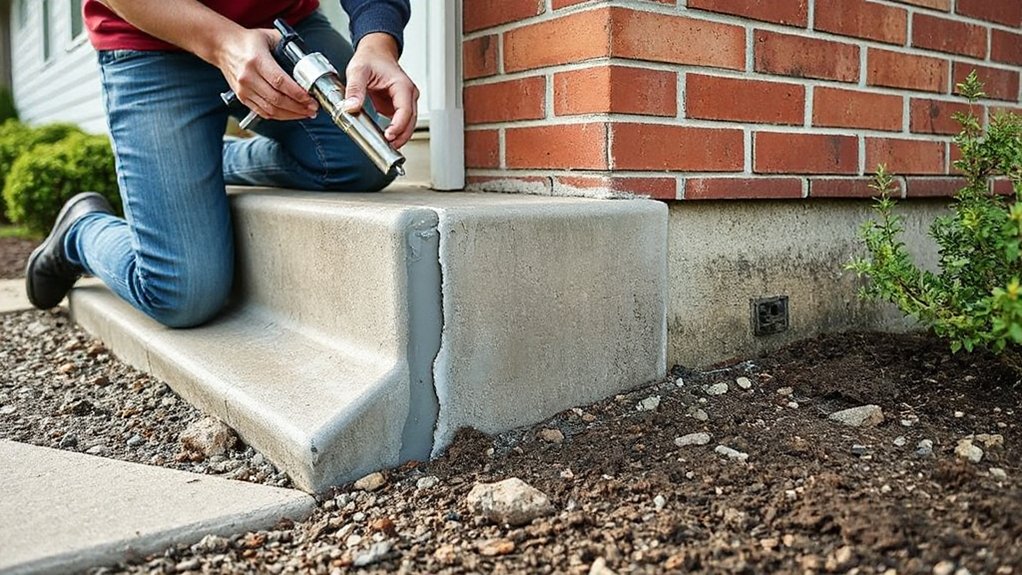
Water that bypasses roof edges often ends up at the foundation, so don’t ignore small cracks in concrete or masonry—seal them before freeze–thaw cycles and hydrostatic pressure widen the gap and route moisture into basements or crawlspaces.
Start with Foundation monitoring: photograph and measure crack width, then mark endpoints to track Crack expansion over time.
If the crack is static and under 1/8 inch, clean it, remove loose material, and inject polyurethane or apply an elastomeric masonry sealant; tool it tight to shed water.
For step cracks in block, seal each stair-step joint and repoint missing mortar.
Wear gloves and eye protection, and keep sealants off skin.
If cracks grow, offset, or leak, call a structural pro.
Frequently Asked Questions
How Often Should I Schedule a Professional Exterior Inspection for Weather-Related Issues?
Schedule a professional exterior inspection annually, and after major storms. You’ll catch compromised roof ventilation, loose flashing, and siding damage early. Pair inspections with seasonal gutter maintenance to prevent water intrusion, ice dams, and structural rot risks.
Which Home Insurance Coverages Typically Apply to Exterior Storm Damage Repairs?
You’ll usually rely on dwelling coverage for structure, other structures for fences/sheds, and personal property if items blow away; Insurance claims depend on peril. Like my neighbor’s “umbrella” policy, Coverage limits decide what stays dry.
What Exterior Repair Projects Require Permits in My Municipality?
You’ll typically need permits for structural repairs, roof replacement, window/door resizing, siding changes, deck builds, and electrical or plumbing exterior work. Verify permit requirements and local regulations with your building department, and schedule inspections to guarantee code compliance.
What Are the Warning Signs of Hidden Moisture Behind Walls or Insulation?
You’ll spot hidden moisture by musty odors, peeling paint, cold damp patches, bubbling drywall, warped baseboards, and rising humidity—it’s a million red flags. Confirm moisture intrusion with a meter; treat leaks fast to prevent wall mold.
Which Exterior Materials Perform Best in Coastal or High-Humidity Climates?
You’ll get best performance from fiber-cement siding, marine-grade aluminum, stainless fasteners, and PVC trim; they maximize salt spray resistance and limit seawater corrosion. You’ll seal joints, back-prime cuts, and specify breathable coatings.
Conclusion
If you stay ahead of exterior wear, you’ll stop water before it becomes structural damage. Seal joints with the right rated sealant, then scrape, prime, and paint exposed wood to block rot. Keep gutters clear and extend downspouts so runoff can’t saturate siding or the foundation. Replace failing trim, siding, and flashing promptly. Wear gloves, eye protection, and fall protection. Especially, water damage drives about 24% of homeowner insurance claims.